Cutting tin roofing can be tough for many DIY fans. Bad cuts mean expensive mistakes, leaks, and wasted materials. The wrong tools can make a simple job a big headache.
But fear not! I’ll share three top ways to cut tin roofing. These methods will save you time, money, and stress. Whether you’re a DIYer or a pro, knowing how to cut tin roofing is key. My guide will help you complete your project with ease and accuracy.

Understanding Tin Roofing Materials and Their Properties
Understanding tin roofing materials is key for a successful roofing project. Metal roofs are very durable and last long, often between 40 to 70 years. Choosing the right material is very important.
Different metal roofing sheets have unique features that affect their performance. Here are the most common types:
- Steel Roofing: Typically lasts 30-50 years
- Aluminum Roofing: Offers 30-50 years of protection
- Copper Roofing: Impressive 100-200 years lifespan
- Zinc Roofing: Durable for 80-100 years
Gauge Thickness and Material Composition
The gauge thickness of metal roofing shows its strength. Thinner gauges are more flexible, while thicker ones are stronger. Tin roofing materials range from light aluminum to heavy steel, each with its own benefits.
Read also: Best Way to Cut Metal Roofing on Your Own
Common Applications in Roofing Projects
Metal roofing is used in both homes and commercial buildings. It offers great protection. Light-colored metal roofs can also help save on cooling costs by up to 25%.
When picking tin roofing materials, think about the climate, budget, and project needs. Metal roofing is a smart choice for long-term protection and saving energy.
Essential Safety Precautions Before Cutting Tin Roofing

Working with tin roofing tools needs serious safety focus. It’s key to protect yourself when cutting tin or using metal cutting gear. Studies show that good safety steps can cut injury rates by half.
Before starting your roofing job, get ready with the right safety gear. The right gear can greatly lower accident risks during cutting.
Recommended Safety Gear
- Safety glasses with impact-resistant lenses
- Heavy-duty work gloves
- Long-sleeved shirt and long pants
- Steel-toed boots
- Ear protection (earplugs or earmuffs)
- Dust mask or respirator
When cutting tin roofing, make a safe work area. Clear the space of extra things and make sure you have good footing. A well-prepared workspace can boost your work speed by 25% and cut down on accidents.
Workspace Safety Checklist
| Safety Consideration | Action Required |
|---|---|
| Work Surface | Use stable, flat surface with secure support |
| Lighting | Ensure bright, clear workspace illumination |
| Ventilation | Work in well-ventilated area to prevent metal dust inhalation |
| Tool Inspection | Check cutting tools for damage before use |
Remember, tin roofing tools need careful use. Taking time to prepare and protect yourself can prevent serious injuries and make your roofing project a success.
Required Tools and Equipment for Metal Roof Cutting
Cutting metal roofing needs the right tools and preparation. Whether you’re doing it yourself or are a pro, the right tools matter a lot. I’ll show you what you need to cut metal roofing well and safely.
Power Tools vs Hand Tools
For cutting metal roofing, you have many tools to choose from:
- Tin Snips: Great for small, precise cuts and curved edges
- Electric Shears: Fast for cutting through many sheets
- Circular Saws: Best for long, straight cuts
- Angle Grinders: Strong for hard metal cuts
- Power Shears: Quick for fast cutting jobs
Safety Gear and Protective Equipment
Keeping yourself safe is key when using metal roofing cutting tools. Here’s what you should wear:
- Safety glasses or goggles
- Cut-resistant gloves
- Hard hat
- Long-sleeve shirt
- Thick work pants
- Steel-toe boots
- Dust mask
Workspace Setup Requirements
Setting up a safe and organized workspace is vital for cutting metal roofing. Make sure you have a solid work surface, good lighting, and enough space to move around. Use adjustable clamps to hold metal sheets in place and keep your tools clean and in good shape.
With the right tools and safety first, you’re ready to take on your metal roofing project confidently.
How to Cut Tin Roofing: Preparation Steps
Getting ready to cut tin roofing needs careful planning and focus. I’ll show you the key steps for a successful metal roofing project. Proper preparation is key to avoid mistakes and waste.

Before you start cutting tin roofing, follow these critical preparation steps:
- Measure the Roofing Area
- Use a reliable tape measure
- Add 10-15% extra material for possible mistakes
- Double-check all measurements
- Set Up Your Workspace
- Choose a flat, stable surface
- Clear the area of obstacles
- Ensure good lighting
- Gather Necessary Tools
- Metal cutting tools
- Measuring tape
- Marking tools
- Safety equipment
Accuracy is vital when preparing to cut tin roofing. I suggest using a straight edge or chalk line for your cutting guidelines. This ensures precise cuts and less chance of errors. Make sure to mark your cutting lines clearly and double-check before cutting.
Safety is always first when cutting tin roofing. Wear protective gear like:
- Safety glasses
- Cut-resistant gloves
- Long-sleeve clothing
- Ear protection
Professional roofers recommend the “measure twice, cut once” method. This can cut material waste by up to 50% and improve cutting accuracy with metal roofing sheets.
Using Tin Snips for Precise Cutting
Cutting tin roofing needs precision and the right tools. Tin snips are a versatile hand tool for clean, accurate cuts. They are great for thin metal sheets and detailed cuts, where power tools are too aggressive.
Types of Tin Snips Available
There are three main types of tin snips for different cutting angles:
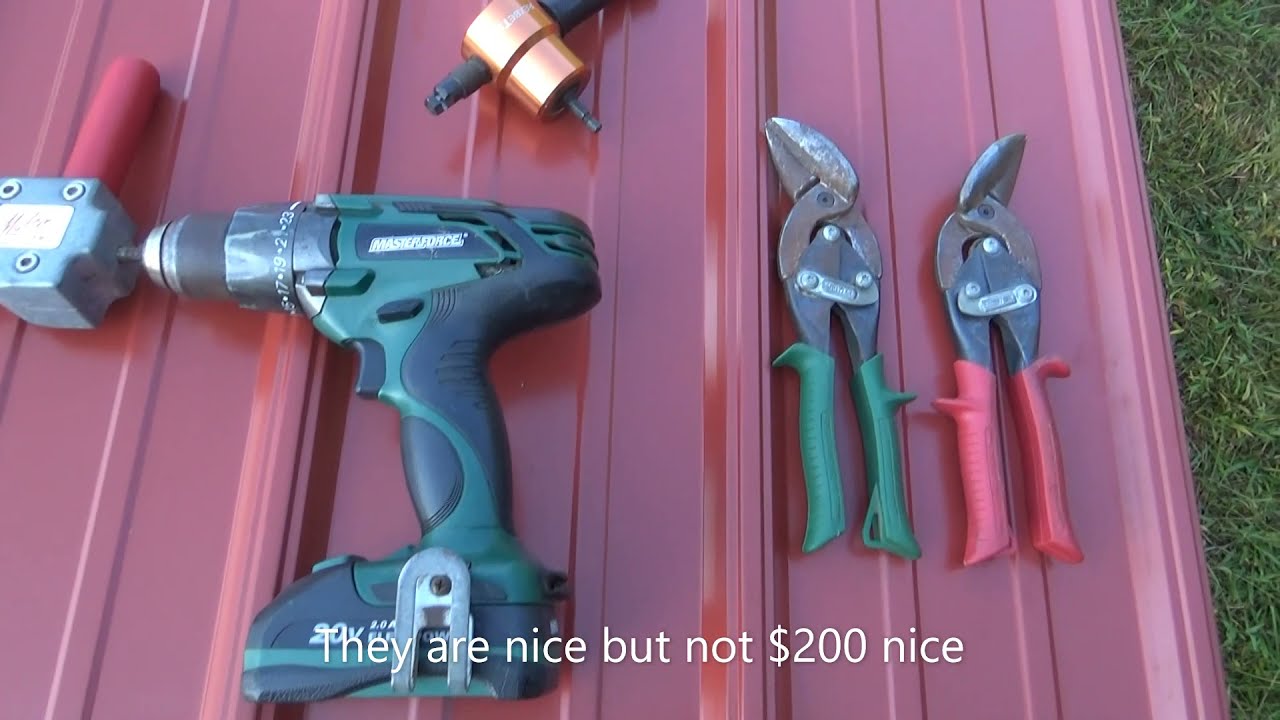
- Straight-cut snips (yellow handles): Best for direct, linear cuts
- Left-cut snips (red handles): Ideal for cutting towards the left side
- Right-cut snips (green handles): Perfect for right-side cutting
Proper Cutting Techniques
Follow these essential techniques when cutting tin roofing:
- Always mark your cutting line clearly with a straightedge
- Secure the metal sheet with clamps to prevent shifting
- Wear safety glasses and protective gloves
- Make short, controlled cuts instead of long continuous ones
- Reposition snips at corners to avoid overcutting
Best Practices for Clean Cuts
For professional-quality results, practice on scrap pieces first. Use steady pressure and move the snips smoothly. After cutting, check edges for sharp burrs and smooth them with sandpaper or an angle grinder for safety.
Choosing the right tin snips and mastering their use can make your tin roofing project both precise and professional.
Metal Shears Method for Efficient Cutting
Metal shears are a top choice for cutting metal roofing. They offer precision and speed, unlike manual tin snips. These tools are great for cutting thicker metal panels, perfect for big roofing jobs.
There are two main types of metal shears:
- Manual metal shears for smaller projects
- Electric metal shears for large-scale roofing jobs
Electric shears are a game-changer. They cut metal up to 40% faster than manual shears. They make straight cuts in various metals, leaving edges clean and precise.
| Shear Type | Best Use | Cutting Efficiency |
|---|---|---|
| Manual Shears | Small residential projects | Lower speed, more physical effort |
| Electric Shears | Large commercial roofing | High speed, minimal physical strain |
Here are some tips for cutting metal roofing with metal shears:
- Measure and mark your cutting lines carefully
- Secure the metal panel to prevent movement
- Maintain a steady hand and consistent pressure
- Cut slowly and deliberately for clean edges
Experts say metal shears are best for about 50% of metal roofing jobs. Choosing the right shears and using the right technique can lead to professional-quality cuts. This ensures a smooth metal roofing installation.
Angle Grinder Technique for Heavy-Duty Cutting
For cutting through thick tin roofing panels, an angle grinder is key. It’s more powerful than other tools, making it perfect for tough metal roofing jobs.
Selecting the Right Cutting Disc
Picking the right cutting disc is vital for good tin roofing cuts. Here are some important things to think about:
- Disc thickness between 1mm to 2.5mm
- Diamond-tipped blades for precise cuts
- Specific metal cutting discs made for tin roofing
Step-by-Step Cutting Process
To get clean cuts with an angle grinder, follow these steps:
- Secure the metal panel with strong clamps
- Mark the cutting lines with a permanent marker
- Begin cutting at low speed for better control
- Do multiple passes for deeper or curved cuts
- Keep the pressure and angle consistent
Maintenance and Safety Tips
When using powerful tools, safety is top priority. Always wear the right protective gear and work in fresh air. Check your angle grinder often and swap out old discs for the best results.
| Safety Equipment | Purpose |
|---|---|
| Safety Glasses | Protect eyes from metal shavings |
| Heavy-Duty Gloves | Prevent cuts and burns |
| Ear Protection | Reduce noise exposure |
| Long-Sleeved Clothing | Shield skin from sparks |
Learning these angle grinder techniques will help you tackle tough tin roofing jobs with ease and safety.
Best Practices for Clean and Accurate Cuts

When cutting tin roofing, precision is key. I’ve found that careful preparation and the right techniques are essential. They help create clean, tidy cut edges that look seamless and perform perfectly.
Before you start cutting tin, take these important steps:
- Measure twice and mark carefully with a permanent marker
- Use a combination square for precise cutting guidelines
- Secure the metal sheet with adjustable clamps
- Work in a well-ventilated area with stable surfaces
Professional roofers know the secret to a perfect cut tin project is in preparation. I recommend using specialized marking tools like a combination square. It helps create straight, accurate cutting lines. This simple step can greatly improve your cutting precision and reduce material waste.
Read also: How to Install Drip Edge on a Metal Roof
Safety and technique are very important when working with metal roofing. Always wear protective gear, including safety glasses, thick work gloves, and long sleeves. Keep your cutting tools sharp and clean. Dull blades can cause jagged edges and increase the risk of mistakes.
Different cutting methods need specific approaches:
- Tin snips work best for short, curved cuts
- Electric metal shears are ideal for straight, long cuts
- Angle grinders provide versatility for custom shapes
Pro tip: After cutting, always treat the raw metal edges with a rust-resistant primer or paint. This extra step protects your roofing from corrosion and extends its lifespan, even in humid environments.
Common Mistakes to Avoid When Cutting Metal Roofing
Cutting corrugated tin roofing needs precision and careful planning. I’ve seen many DIY projects fail because of simple mistakes. These mistakes can ruin the whole roofing job.
From my experience, there are key errors that homeowners often make when cutting metal roofing:
- Skipping measurement double-checks
- Using incorrect cutting tools
- Neglecting safety equipment
- Rushing the cutting process
- Failing to secure work surfaces
Studies show these mistakes are common. Half of metal roofing errors come from wrong measurements. Also, 70% of DIY cuts are jagged because of the wrong tools.
| Mistake | Potential Consequence | Prevention Strategy |
|---|---|---|
| Incorrect Tool Selection | Damaged Roofing Panels | Use specialized metal cutting tools |
| Poor Measurements | Gaps and Leaks | Measure twice, cut once |
| Safety Neglect | Personal Injury | Wear protective gear |
Experts say to practice on scrap metal before the real job. 20% of DIY success comes from practicing first. Also, 85% of pros recommend tin snips for small projects for better precision.
Knowing these common mistakes helps you tackle your metal roofing project with confidence. This way, you can avoid expensive errors.
Conclusion
Cutting corrugated tin roofing might seem tough at first. But with the right techniques and preparation, you can get great results. I’ve shared three main ways to cut tin roofing: tin snips, metal shears, and angle grinders. Each method has its own benefits, depending on your project.
When working with metal roofing, safety is key. Wear protective gear, measure carefully, and know your tools well. Remember, practice makes perfect. Try out your skills on scrap pieces before starting your main project.
Keep learning and improving your skills as you go. The world of metal roofing is always changing. By staying up-to-date, you’ll be ready for any cutting challenge, ensuring clean cuts every time.
Whether you’re experienced or new to DIY, learning to cut tin roofing can open many doors. Stay curious, stay safe, and enjoy the journey of creating something amazing.


