All types of buildings, including industrial, institutional, or commercial buildings, need roof ventilators for the manufacturing process or just for comfort.
This element provides airflow, which can help lengthen the building’s life. If you want to do a DIY project to get the ventilators, read about the guide on how to install roof ventilators in the following.
How to Install Roof Ventilators
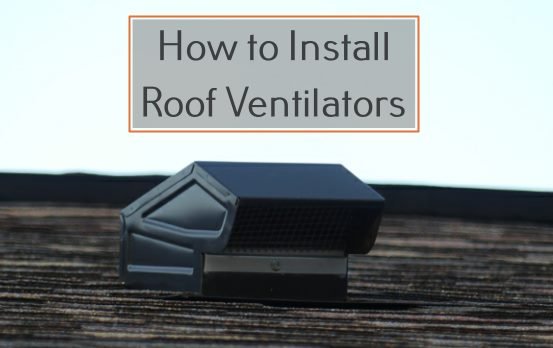
Roof ventilators help the building’s interior space to stay dry during winter and cool during summer. There are several types of roof vents to match the building’s climate. Here are some of them:
Read also : Roof Vent Pipe Boot Repair
- Ridge vents: Ventilators installed on the ridge or peak of roof area and usually covered by roofing shingles.
- Soffit vents: Come as a pair for ridge vents and are typically installed on the roof’s soffit. They work to reduce the accumulated moisture in the roofing area.
- Cupola vents: Placed at the upper part of the ridge. They work to draw moisture and heat on the facility.
- Powered vents: Electric-powered fans that are installed in the attic gables and used for larger roofing areas.
- Gable intake vents: Triangular-shaped ventilators installed on the height of gables.
To know in details about the best roof ventilation methods, see the step-by-step guide below:
- Select the area where the roof ventilator is going to be installed.
- Remove a couple of tiles on the area and set them aside.
- Slide flashing into the area to install it. The flashing must sit underneath the tiles. Roll the forefront edge and form a lip shape of flashing by using your hands.
- The next step in installing roof ventilators is to drill one of the ends of the strap included in the roof ventilators set to secure the flashing.
- Put whirly ventilator above the flashing in a close-fitting way. Now, screw the ventilator to the flashing by using a cordless drill.
- Remove some part of the ventilator’s foam packers after you have successfully secured the vent to the flashing. That way, the ventilator can be seen from an optimal angle. Adjust the ventilators until the top part of it sits flat, remove the entire foam packers and see if the vent spins correctly.
- Drill screws to the rest of holed underneath the ventilators to fix its position. Now, you only need to clean the silicone at the flashing’s sides after the vent is already secured.
How to Install a Bathroom Roof Vent
A common problem with the bathroom is that it’s the perfect place to invite damages and molds due to being in steamy condition for the most time. Installing a ventilator is one of the ways to prevent this issue.
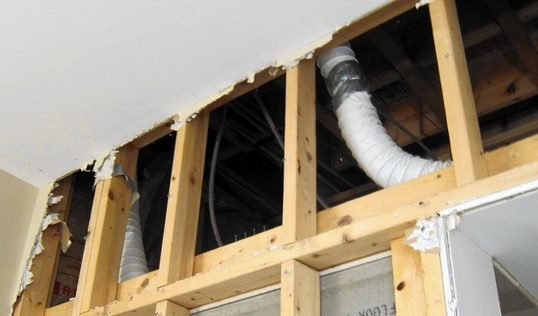
Here’s how to install the bathroom vent from the roof on your own:
- Figure out where the bathroom vent is going to be installed.
- Affix the ventilator into the bathroom ceiling.
- Create the vent hole in the ceiling by making a mark and then drill on its center.
- Attach the ventilator to the vent pipe
- Create a square hole that a bit larger than the vent pipe.
- Cut the asphalt shingles on the sides of the hole by using a hook blade.
- Tear the shingles near the square hole carefully.
- Apply cement for asphalt roof around the underneath area of the vent.
- Install the vent beneath the shingles until the shingles cover the air vent flange.
- Secure the flange in the corner by using nails and cover the nails by using roof tar.
- Connect the bathroom vent pipe to the ventilation hood in the attic.
Follow thoroughly the guides on how to install roof ventilators above. By installing the vent currently, you can maximize your home’s energy efficiency and extend the roof system’s life.


