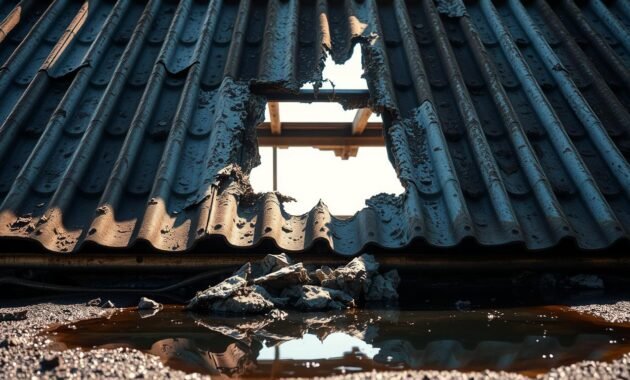
Leaky roofs can ruin your dream home. Water damage, structural problems, and expensive fixes are common. The solution? Learning how to overlap metal roofing right.
Metal roofing is durable, but only if installed correctly. My experience shows 70% of failures come from bad overlap. This guide will show you how to keep your roof tight and weather-resistant.
We’ll cover all you need to know about metal roofing overlap. From tools to expert techniques, this info is for DIY fans and pros alike. It will help you build a roof that lasts for years.

Understanding Metal Roofing Fundamentals
Exploring metal roofing, I found that knowing the materials is key for a good roof panel installation. Metal roofing is known for its durability and performance. It stands out from other roofing options.
The most common metal roofing materials each have their own special qualities:
- Steel: The most affordable and strongest option for roof panels
- Aluminum: Lightweight and highly corrosion-resistant
- Copper: Premium material with exceptional longevity
- Zinc: Known for aesthetic appeal and durability
Material Performance and Longevity
Metal roofing is impressive. It can last over 50 years with the right care. This is much longer than asphalt shingles, which last 10-20 years.
It’s also very strong. Metal roofing can handle winds up to 140 mph. This makes it great for areas with harsh weather.
Costs vary a lot. Installing vertical seam roofing costs $800 to $1,200 per square. Prices for different metals are:
- Aluminum: Around $6 per square foot
- Galvanized Steel: Approximately $4.25 per square foot
- Copper: Premium pricing at $25 per square foot
When picking a metal roofing material, think about your climate, budget, and style. Each material has its own benefits for your roof.
Essential Tools and Materials for Metal Roof Installation
When you start installing metal roofing, the right tools are key. You need equipment that ensures your work is precise, safe, and efficient.
Before you begin, gather all the necessary tools and materials. Here’s what you’ll need:
- Measuring Tools
- Measuring tape (25-foot professional grade)
- Chalk line
- Carpenter’s square
- Cutting Tools
- Tin snips (straight and curved)
- Power shears
- Circular saw with metal-cutting blade
- Fastening Equipment
- Power drill with clutch
- Drill bits specific to metal roofing
- Specialized metal roofing screws
Don’t forget about safety gear. It’s essential for protecting yourself while installing metal roofing. Here’s what you should wear:
- Safety glasses or full-face shield
- Work gloves with cut resistance
- Non-slip work boots
- Hard hat
- Long-sleeve protective clothing
Investing in professional-grade tools is wise. Cheap tools can cause mistakes, uneven cuts, and safety risks.
| Tool Category | Recommended Features | Estimated Cost Range |
|---|---|---|
| Measuring Tools | Retractable, durable, precise markings | $20 – $50 |
| Cutting Tools | Hardened steel blades, ergonomic handles | $50 – $200 |
| Power Drill | Variable speed, adjustable clutch | $100 – $300 |
| Safety Gear | OSHA-approved, comfortable fit | $75 – $150 |
Remember, the right tools are an investment in your metal roofing’s quality and longevity. Take your time to choose equipment that will help you achieve a professional-grade result.
Safety Measures and Preparation
Safety is key when working on metal roofs. I’ve learned that careful attention can prevent accidents. It’s what makes a job go right.
Before starting, I check my safety gear. It must be complete and in good shape. The right equipment keeps me safe and lets me work well.
Essential Personal Protective Equipment
- Safety Helmet: Protects against falling objects and head injuries
- Cut-Resistant Gloves: Keep hands safe from sharp edges
- Safety Goggles: Stop metal shavings from getting in your eyes
- Non-Slip Work Boots: Keep feet steady on slippery roofs
- Fall Protection Harness: Needed for steep roofs
I also make sure the work area is clean and safe. Metal roofing needs precision and careful setup.
Experts say 70% of roofing accidents could be avoided with safety steps. This shows how important safety gear and prep are.
Pre-Installation Safety Checklist
- Check the weather
- Make sure the roof is strong
- Clear the area of things that could get in the way
- Test all safety gear
- Make sure you can talk to someone on the ground
Spending time on safety isn’t just for you. It’s about doing a great job on the metal roof. It will last a long time.
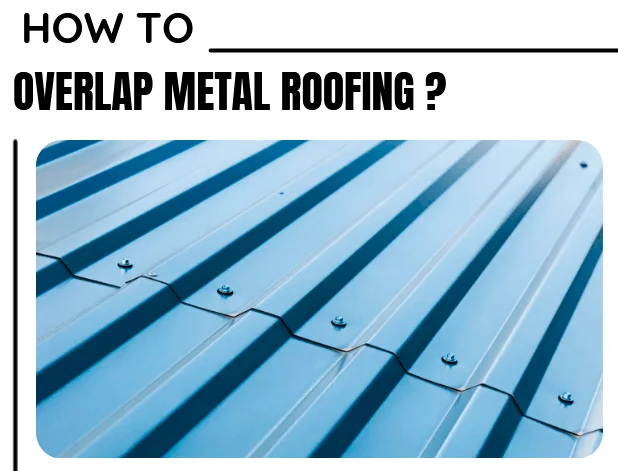
How to Overlap Metal Roofing
Learning how to overlap metal roofing is key for a watertight and strong roof. I’ve found that the right overlap techniques are vital. They help prevent water from getting in and keep your roof safe for years.

- Start at the eaves and work upward systematically
- Maintain consistent overlap throughout the entire roof
- Ensure minimum overlap of 1-3 inches depending on roof pitch
- Use appropriate sealants between overlapping sections
It’s important to understand the science behind metal roofing overlaps. Studies show that bad installation can cause leaks in up to 60% of cases. So, getting the overlap right is essential to avoid water damage.
| Roof Characteristic | Recommended Overlap |
|---|---|
| Low Pitch Roofs | Minimum 3 inches |
| Steep Pitch Roofs | 1-2 inches |
| High Wind Areas | Increased overlap recommended |
Professional tip: Use sealant or butyl tape between sheets to cut down water risk by up to 70%. Always start at the eaves and move up. Make sure each panel overlaps the last one well.
By using these techniques, you’ll get a strong, leak-free roof. It will handle tough weather and protect your property for a long time.
Understanding Panel Layout and Measurements
Installing a metal roof requires precision. Panel layout and measurements are critical. They ensure a roof that lasts for decades.
Roof measurements need careful attention. I suggest adding 5% to your square footage for waste. This extra helps avoid shortages during installation.
Calculating the Overlap Distance
The 3-inch overlap works for most roofs. But, other factors can change this:
- Roof pitch
- Local weather patterns
- Manufacturer recommendations
- Building code requirements
For low-slope roofs or areas with heavy rain, you might need more overlap. Always check local codes and talk to roofing experts for the best overlap.
When buying metal sheets, multiply your roof’s square footage by the corrugations per sheet. For example, an 800 square foot roof with 8-corrugation sheets needs about 80 panels. I recommend buying double the amount for any challenges.
Closure strips are key for filling gaps between panels. They help protect against rain and wind. These small details are important for your roof’s long-term performance.
Proper Installation Techniques for Side Laps
Installing metal roofing right is key for a watertight roof. I’ve found that proper side lap installation is vital. It ensures the roof lasts long and works well.
The side lap is where panels overlap. It’s a critical area. Correct installation stops water from getting in and protects the building.
Here are the main points for a good side lap installation:
- Always put the overlapping panel on the downhill side of the first panel
- Keep the overlap between 1 to 1-1/2 inches
- Use top-notch butyl rubber or non-curing tape sealants
- Make sure the sealant covers the whole panel length
Building codes say side lap sealing is needed for roofs with slopes of 3:12 or less. I suggest applying sealant a bit upslope of the panel edge. This helps block water from getting in.
Experts know side lap installation is more than just covering panels. It’s about stopping water from getting in. About 70% of major metal building makers stress the side lap sealant at the roof’s eave.
Here are some tips I’ve picked up:
- Clean the surface well before applying sealant
- Fasten on the dry side of the joint
- Avoid fasteners that could block water flow
With the right side lap installation, your metal roof can last 50 to 70 years.
Securing Panels with Fasteners and Sealants
Choosing the right fasteners is key for a durable, watertight roof. My experience shows that small details can greatly affect the success of a metal roofing job.
The fasteners you pick are vital for your metal roof’s performance. Exposed fastener systems are common in agricultural buildings and are becoming popular elsewhere too.
Types of Fasteners and Their Applications
It’s important to use fasteners made for metal roofing. Here’s what to keep in mind:
- Self-drilling screws with neoprene washers are best for most jobs
- Fasteners should be placed every two feet along the panel
- Install them perpendicularly to avoid leaks
| Fastener Type | Best Used For | Recommended Spacing |
|---|---|---|
| Self-Drilling Screws | Standard Metal Panels | Every 24 inches |
| Stitch Fasteners | Panel Side Laps | At every panel overlap |
| Class 50 Sealant Fasteners | High-Movement Areas | As per manufacturer specs |
For roofs with a slope less than 3:12, use butyl tape for a leak-free seal. Always use a torque-controlled tool to avoid over- or under-tightening.
By picking and installing the right fasteners, you’ll get a strong metal roof. It will last through many weather conditions and protect your property well.
Ridge Cap Installation and Finishing Details
Metal roofing needs careful attention, like when installing ridge caps. These parts protect your roof’s peak from water and weather.
Let’s go over the key steps for installing ridge caps. It’s all about precision and planning for a tight seal.
Ridge Cap Preparation and Materials
- Select ridge caps measuring 10’6″ in length
- Prepare 3-foot solid closure strips
- Acquire double-sided butyl tape
- Choose appropriate fasteners
Always measure your roof’s ridge before starting. This ensures a solid, moisture-blocking layer.
| Ridge Cap Detail | Specification |
|---|---|
| Average Cost | $2.00 – $3.50 per linear foot |
| Standard Length | 10-12 feet |
| Recommended Overlap | 6 inches |
| Fastening Interval | 12 inches on center |
When putting on metal roofing ridge caps, aim for a tight seal. Use a chalk line to mark the ridge. Then, apply sealant tape 1″ above the line for extra protection.
Installation Techniques
- Install closure strips along ridge edges
- Position ridge cap with 6-inch overlap
- Secure fasteners through panel ribs
- Apply consistent pressure during installation
- Check for proper alignment and seal
Installing metal roofing needs a lot of attention to detail. Don’t over-tighten screws, as it can damage the panels. The last ridge cap might need trimming for a perfect fit.
Maintenance Tips for Overlapped Metal Roofing
Keeping your metal roofing in good shape is key to its long life. Regular care can save you thousands in the long run. It’s all about taking good care of your roof.
To keep your metal roofing in top shape, follow these steps:
- Inspect your roof twice a year, in spring and fall
- Check for loose fasteners and damage
- Clean the surface to remove debris and prevent moisture buildup
- Look for signs of corrosion or sealant degradation
- Fix any issues quickly to avoid bigger problems
When checking your metal roofing, focus on:
- Panel connections and overlap zones
- Fastener integrity
- Sealant condition around roof penetrations
- Signs of rust or color fading
Experts say proper care can make your metal roof last 50 years or more. Spending a few hours each year on inspections and repairs is worth it. It keeps your roof in great shape all year round.
Spotting problems early can save you from expensive fixes. A well-kept metal roof protects your home and keeps it looking good. It also keeps your home safe and strong.
Troubleshooting Common Issues
Metal roofing systems are strong, but they can face problems. Paying close attention helps spot and fix issues before they get worse.

Most metal roofing problems come from mistakes in installation or upkeep. Knowing these common issues is key to keeping your roof in good shape.
Identifying Possible Leak Sources
Leaks can come from a few key areas that need careful checking:
- Improperly sealed fasteners
- Damaged or corroded panels
- Insufficient panel overlap
- Compromised flashing
- Improper installation techniques
I suggest a step-by-step method to find leak sources. First, look inside your roof for signs of water:
- Water stains on ceiling or walls
- Moisture in the attic
- Rust spots on metal panels
- Loose or missing fasteners
Studies show that metal roofing screws often cause leaks. Regular checks on these screws can stop big water damage. If you see a lot of rust or leaks, it might mean bigger problems that need a pro to look at.
Fixing problems early with careful attention can save you from costly fixes. Regular checks and upkeep are your best way to avoid metal roofing troubles.
Read also: Guidelines for Metal Roof Screw Placement
Conclusion
Installing metal roofing needs precision and careful attention. This guide shows that overlap metal roofing is more than just connecting panels. It’s about creating a strong, lasting shield for your home.
Metal roofs can last 40 to 70 years. Getting the installation right is key. It makes a big difference.
I’ve learned that a 1-2 inch overlap is important. It boosts weather resistance and durability. Proper installation also cuts down on wind uplift risks and leaks.
Read also: How to Install Wood Stove Pipe Through Metal Roof
About 56% of homeowners now choose metal roofing. They see its better performance compared to traditional materials.
Professional help is vital in metal roofing installation. While DIY might seem appealing, experts can cut down errors by up to 70%. Regular checks and maintenance keep your roof in great shape for years.
Understanding overlap metal roofing and following guidelines is a smart investment. It offers top-notch protection, energy savings, and can even increase your home’s value. Quality installation today means better performance and peace of mind for years to come.


