Many people believe that a roof vent’s sole purpose is to release sewer gases outside the house. However, its primary function is to facilitate proper drainage and sewer system operation by allowing air to flow into the sewage system and balancing pipe pressure.
Despite their importance, roof vents can often lead to issues like roof leaks, commonly occurring at the roof vent pipe collar. Fortunately, resolving this issue is relatively straightforward.
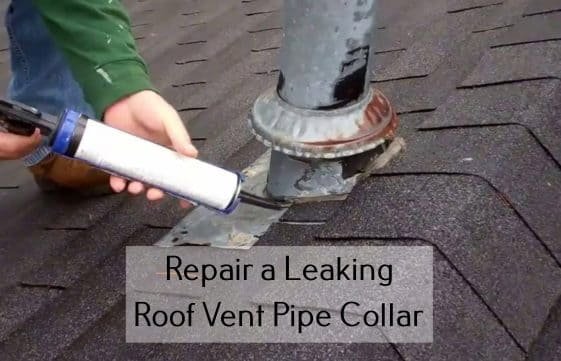
How to Repair a Damaged Roof Vent Pipe Collar
Usually, this is the place where a roof leak occurs. The collar pipe is located around the bottom of the ventilation pipe, where it protrudes through the material roofing surface.
Read also: How to Overcome Leaking Metal Roof
Generally, this collar consists of a rubber boot and metal plate, typically made from aluminium, built into the collar’s top.
If the pipe collar is damaged, rainwater accumulates and seeps into the home’s interior walls, leading to significant damage. Replacing the damage is essential. Fortunately, this repair is less time-consuming and costly than other roof repairs.”
Read also: Roof Vent Pipe Boot Repair
There is no need to call a professional to get the problem solved. Follow the replacement procedure below to get the vent pipe repaired.
- Preparation
Purchase a new rubber seal from the local hardware store. Before going up to the roof, cut the rubber boot first using a metal shear or heavy scissors to lessen the arduous task while on the roof. It would be best to cut the rubber oversize.
- Trim the Rubber Boot
While working on the roof, make sure to have a sense of safety precautions. Trim the rubber boot with a cutter until it perfectly fits over the previous rubber boot. Make sure everything is aligned and looks great.
- Get the Rubber Boot Sealed in Place
Apply a considerable amount of sealer that is made from silicone over the previous rubber boot. Put the new rubber boot and ensure no space between the old and the new rubber boot.
- Clean the Excessive Silicone Sealer
Since you put in many sealers, it will squeeze out while you apply the new rubber boot. Use a cloth to clean up the excessive silicone sealer and smooth it out. Now, the roof vent repair process is done. The seal is perfectly tight. Either rainwater or debris will not be able to get through it.
This reparation process and the shingles will not affect the current roof material. Although this method is relatively easy to conduct, the rubber boot will not last long due to the harsh weather exposure.
Eventually, cracks will be found on the rubber boot, which will not prevent the rainwater from entering the house. The right time to get the vent pipe repaired is before the damage gets worse. Depending on the weather, replacing the rubber boot or re-applying a sealer is highly recommended.
By conducting roof maintenance every three years and preventing the rubber boot of the roof vent pipe collar from breaking, you will be less likely to experience a leaking vent pipe.


