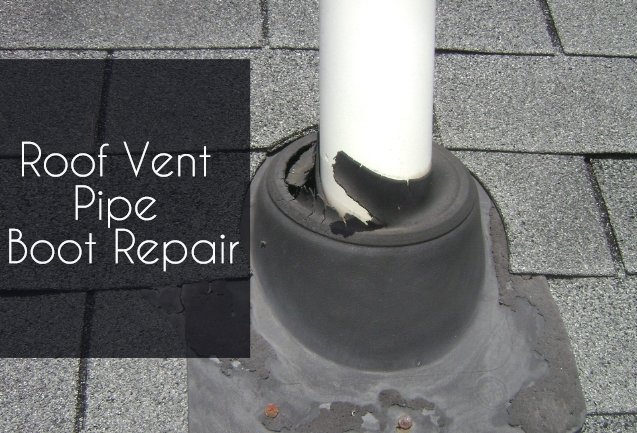
Roof vents are exactly essential to any household plumbing system. They let sewer gases escape securely outdoors without causing pollution to your home and making you sick. They also provide neutral pressure in your pipes so that the wastewater can be removed from the home.
However, water can seep into your home areas once you get in trouble with the roof vents, especially when the rubber boots around the vents wear out or crack. So that is the time when you need to check out the roof vent pipe boot repair information. We’ve got you covered!

How to Repair Boot on Roof Vent Pipe
Basically, the rubber boots on your plumbing vents should be able to last for at least ten years though it may depend on the product quality and local weather. Water can easily drip into the roof once you get in trouble with the split rubber, and spots start to form on your ceiling. This way, the vent boot is a potential problem.
Luckily, it is not a very complicated process to replace vent boots. All you need to do is prepare yourself with the information about repairing roof vent pipe boot.
Prepare Required Equipment
The first thing to figure out on your mind dealing with the roof vent pipe boot repair is preparing the required equipment. As you need to get onto the roof, here are the equipment you should prepare:
- A ladder
- Some caulk
- A new boot to slide into the place
- A roof vent pipe collar
- A knife
- Nails
- Hammer
A ladder is a must-have item to prepare since you need it to get onto the roof, while the basic shingle-repair tools such as knife, nails, and hammer are needed to lift shingles out of the way to remove the boot.
Keep in mind that if you don’t have a rubber boot, you can use metal fishing around your vents, making the replacement process essentially similar.
Steps on How to Repair Roof Vent Pipe Boot
There are some steps to follow in repairing the roof vent pipe boot. Those are as follows;
- Make sure you have all your tools or equipment in place on the roof.
- Start the job by prying up or remove any shingles holding the boot.
- Don’t tear the shingles. If you unintentionally do it, replace them instead of hammering them back in.
- Access the boot.
- Slide a knife under the boot to free it up from any caulk.
- Clean the area from any debris.
- Slide the new boot into the place.
- Nail it and the shingles back as they were.
- You are finished.
Final Words
Conclusively, roof vent pipe boot repair involves a simple and easy preparation and process. Just makes sure that the equipment is ready and the instruction is all followed. However, if you don’t have any experience doing it or you may not feel comfortable with the project, you shouldn’t attempt it. Contact an expert can be a choice.


