Are you tired of expensive roofing repairs? Flat roof leaks can cost a lot and damage your home. Torch down roofing is a DIY solution that can save you thousands.
Many homeowners struggle with roof repairs. They face water damage and high costs for professional work. Torch down roofing seems hard, but with the right help, you can do it yourself.
I’ll show you how to do DIY roofing step by step. You’ll learn how to install torch down roofing properly. This way, you can protect your home, make your roof last longer, and save up to 40% on costs.
With the right preparation and tools, you can master torch down roofing. You’ll turn your flat roof installation into a successful and affordable home improvement project.
Read also: How Much Weight Can a Roof Hold
Understanding Torch Down Roofing Systems and Materials
Torch down roofing is a strong choice for flat and low-slope roofs. It uses a special method to make a waterproof barrier. This is great for homeowners and contractors.
The core of torch down roofing is its modified bitumen membrane. This material is made to handle tough weather. It’s a mix of asphalt and special polymers for better durability and performance.
Modified Bitumen Components
Modified bitumen membranes have special polymers for strength. They include:
- Base asphalt material
- Polymer modifiers
- Reinforcement layers
- Protective surface coatings
Types of Polymer Additives
There are two main types of polymers in torch down roofing:
| Polymer Type | Characteristics | Performance Benefits |
|---|---|---|
| Atactic Polypropylene (APP) | Plastic-based modifier | Enhanced heat resistance |
| Styrene Butadiene Styrene (SBS) | Rubber-based modifier | Superior flexibility |
Essential Safety Equipment
Working with an open flame needs serious safety steps. Fire resistance is key when installing torch down roofing. Always wear flame-resistant clothes, safety glasses, and heat-resistant gloves.
Remember, safety and preparation are vital for a successful torch down roofing job. The right materials and gear will help you make a durable roof. This will protect your property for many years.
Preparing Your Roof Surface for Installation
Getting your roof deck ready is key for a successful torch down roofing project. I’ll guide you through the important steps. This will help you prepare the roof surface for the bitumen primer.
Before you start, inspect the roof deck for any issues. Look for these important things:
- Structural damage or weak spots
- Water ponding areas
- Existing roofing material condition
- Surface levelness and smoothness
Cleaning the roof surface is a must in torch down roofing. I suggest a detailed cleaning to remove:
- Dirt and debris
- Loose roofing materials
- Moss or vegetation growth
- Any existing loose particles
Applying the bitumen primer is vital. It helps the roof deck and roofing membrane bond well. This step prevents leaks in the future.
| Roof Surface Condition | Recommended Action |
|---|---|
| Concrete Deck | Use concrete-specific bitumen primer |
| Wooden Deck | Apply wood-compatible primer |
| Metal Deck | Use metal surface primer |
Proper preparation is key for your torch down roofing system’s success. Take your time to do each step well.
Required Tools and Materials for DIY Roofing
Starting a torch down roofing project needs careful planning and the right tools. I’ll show you the essential tools and materials for a successful roofing system installation. We’ll also keep an eye on the cost.

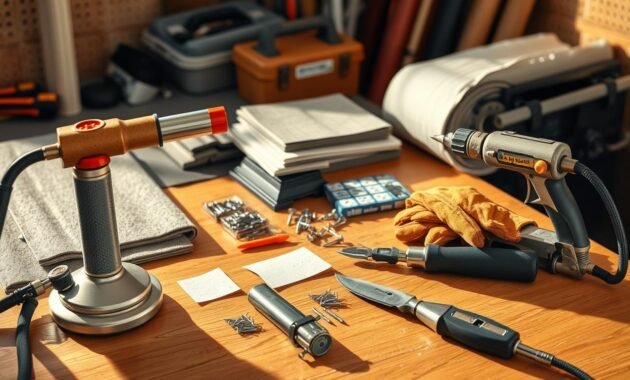
Before you start with roofing torch techniques, gather a set of tools. These tools will make your project easier and more efficient.
Basic Hand Tools for Roofing
- Tape measure (25 feet recommended)
- Utility knife with extra blades
- Hammer (16-20 ounces)
- Roofing pry bar
- Magnetic nail sweeper
Specialized Roofing Equipment
Professional-grade tools make installing roofing systems better. Here’s what you’ll need:
| Equipment | Purpose | Estimated Cost |
|---|---|---|
| Propane Torch | Melting bitumen materials | $50-$150 |
| Pneumatic Roofing Nailer | Fast nail installation | $100-$300 |
| Roofing Sealant | Filling gaps and cracks | $10-$30 per tube |
Safety Gear Checklist
Protecting yourself is key when working with high-temperature roofing. Your safety gear is as important as your tools.
- Hard hat (reduces head injuries by 50%)
- Safety harness (rated up to 310 pounds)
- Heat-resistant gloves
- Safety glasses
- Non-slip work boots
When planning your budget, remember torch down roofing costs $3 to $7 per square foot. Quality tools help you get a professional installation. This saves on long-term maintenance costs.
Proper Installation of Base Layer and Insulation
Building a strong base is key for any torch down roofing job. I’ll show you how to get your base layer ready for a flat or low slope roof. This will help protect your roof for a long time.
The base layer is the first step in your roofing system. You’ll need to focus on three main things:
- Insulation selection
- Vapor barrier installation
- Overlay board preparation
Choosing the right insulation is important. It should match your local climate. Good insulation can cut cooling costs by up to 30% and protect your roof.
| Insulation Type | Best Used For | Performance Rating |
|---|---|---|
| Polyisocyanurate (Polyiso) | Cold Climates | High R-Value |
| Extruded Polystyrene (XPS) | Moisture-Prone Areas | Excellent Water Resistance |
| Expanded Polystyrene (EPS) | Moderate Temperatures | Cost-Effective |
Make sure the vapor barrier covers everything to keep moisture out. The overlay board should make the surface smooth and even. This helps the modified bitumen sheets stick better. Doing this right can make your roof 50% stronger.
It’s very important to apply the base sheet carefully. A well-done base layer reduces water damage risks. It also prepares your roof for harsh weather.
Torch Down Roofing Application Techniques
Mastering torch-down roofing needs precision and careful technique. The modified bitumen process turns asphalt roof layers into a waterproof barrier. I’ll show you the key application methods for a professional installation.

Proper Torch Usage
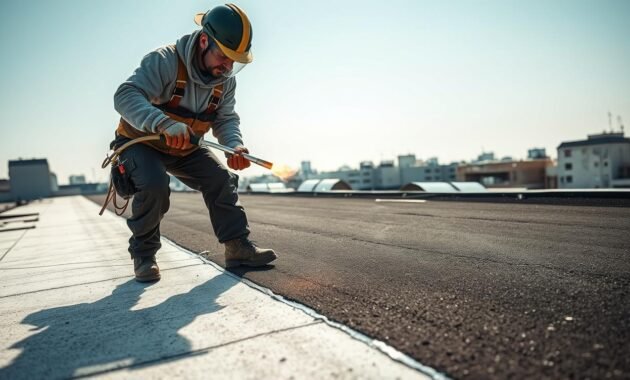
Understanding torch control is key in torch-down roofing. Keep the flame 6-8 inches from the membrane. Move the torch steadily to avoid damage from too much heat.
- Keep the torch moving at a steady pace
- Maintain a consistent flame height
- Watch for even melting of the membrane
- Use protective gear at all times
Seam Sealing Methods
Watertight seams are essential in torch-down roofing. Ensure a three-inch overlap between sheets. Heat the sheets carefully to bond them without leaks.
- Clean the surface thoroughly before sealing
- Align membrane sheets precisely
- Apply consistent heat along the seam
- Roll the seam to ensure complete adhesion
Coverage Patterns
Choosing the right coverage patterns is vital. I suggest a systematic approach for full coverage with no gaps. Pay close attention to overlap and heat distribution.
Success in torch-down roofing comes from careful technique. With practice and detail, you can make a durable, water-resistant roof that lasts for years.
Read also: How Many Roofing Nails per Square for Shingles and Underlayment
Installing Flashing and Edge Details
Installing flashing correctly is key to a water-resistant roof. As a roofing pro, I’ll show you how to install flashing. This prevents water from getting in at important spots on your torch down roof.
- Create a minimum 4-inch target patch around pipe flashings
- Maintain a 0.5 to 1-inch gap between pipe and patch
- Use electro-dipped galvanized nails (1.25 inches long)
- Install nails every 3 inches in a staggered pattern
When installing the cap sheet, remember the gap. Keep a 1/8 to 1/4 inch gap. This ensures the best waterproofing.
More steps for waterproofing include:
- Apply PolyFlash 1C around pipe-to-flashing joints
- Use a layer of smooth rolled roofing underneath low rise flashing
- Clean metal flashing with a wire brush before installation
- Apply asphalt primer for better adhesion
Remember, metal and asphalt expand and contract differently. So, nailing must be precise to avoid separation. By following these steps, you’ll have a strong, water-resistant roof that lasts for years.
Common Mistakes to Avoid During Installation
When you start with torch roofing, knowing the common mistakes can save you a lot of trouble. I’ve seen many DIY projects fail because of small details that were missed.
Installing your roof wrong can shorten its life a lot. Here are the big mistakes that can mess up your torch down roofing project:
Temperature Control Challenges
Keeping the right temperature is key in torch roofing. If it’s too hot or too cold, you’ll face big problems:
- Too much heat can burn the roof, making it weak
- Not enough heat means the roof won’t stick right
- Uneven heat makes the seams not bond well
Seam Overlap Complications
Getting the seam overlap right is very important for a strong roof. If it’s not enough, your roof can get damaged:
| Overlap Issue | Potential Consequence |
|---|---|
| Narrow Seams | Water can get in |
| Uneven Heating | The bond won’t be complete |
| Wrinkled Membranes | The roof won’t be strong |
Knowing these common mistakes can help you avoid problems. This way, you can make sure your roof lasts a long time and stays watertight.
Maintenance Tips for Long-lasting Results
Keeping your flat roof in good shape is key to making it last longer. Regular checks can stop small problems from turning into big, expensive fixes. With the right care, your torch down roof can last 15 to 20 years.
- Conduct bi-annual roof inspections, specially after bad weather
- Look for standing water and make sure it drains right
- Check seams and edges for any signs of separation
- Clear away debris and remove anything that could hold moisture
- Check the granule cap for UV protection and to keep energy costs down
Your roof’s energy efficiency depends on the granule cap. This layer reflects the sun’s rays, which can lower cooling costs in summer. I suggest getting a pro to clean it at least once a year to stop algae and keep it working well.
Important things to check include:
- Flashing around vents and HVAC units
- Potential punctures or cracks
- Seam conditions
- Overall surface condition
By taking the time for regular maintenance, you’ll get the most out of your torch down roof. This will protect your property and save you from expensive repairs down the line.
Conclusion
Finishing a torch down roofing project is a big win for DIY fans. This roofing system can last 20 to 25 years if done right. It gives your home a strong, waterproof layer against bad weather.
Choosing torch down roofing is more than just fixing up your house. It’s a smart move to protect and increase your home’s value. It fights mold, is fire-safe, and saves energy. Starting with a $3 to $6 per square foot investment can save you money in the long run.
Before starting, think about your skills and comfort level. This guide helps a lot, but getting a pro might be safer if you’re unsure. Always prepare well, pay attention to details, and keep safety first for a successful project.
Read also: How to Attach Roof over Deck from House
Your new roof shows your dedication to keeping your home safe. With the right care, it will last for many years, handling tough weather with ease.


