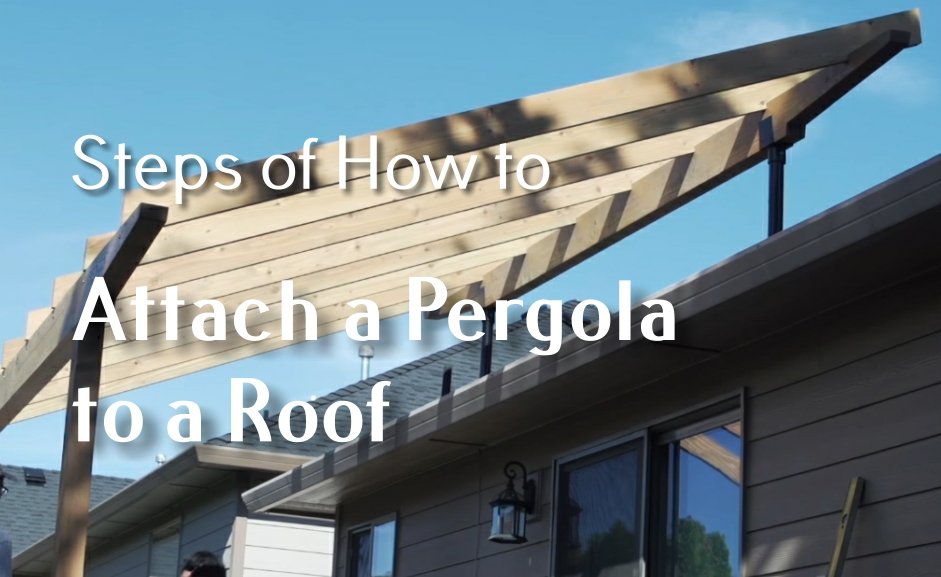
Are you having trouble attaching a pergola to your home? Many people struggle with this, risking unstable setups and damage. An improper attachment can ruin your dream outdoor space.
I’ll show you how to safely and effectively attach a pergola to your roof. My guide will help you create a beautiful outdoor area. You’ll have a secure and stunning pergola that improves your home’s look.
Understanding Pergola Attachment Methods and Requirements
Choosing the right method to attach a pergola to a roof is key. Not all attachment techniques are the same. I’ve learned this from years of experience.

Installing a pergola requires careful thought. The attachment method affects the structure’s stability and performance.
Traditional vs Modern Attachment Techniques
Older methods used direct mounting for pergola roof brackets. These included:
- Direct roof penetration
- Simple bracket connections
- Minimal weatherproofing
Modern methods have changed the game. The SkyLift Roof Riser system is a big step forward. It offers:
- Enhanced weatherproofing
- Improved air circulation
- Better structural integrity
Load Bearing Considerations
Knowing your roof’s weight limit is key for attaching a pergola roof. Different roofs can handle different weights.
| Roof Type | Weight Capacity | Recommended Attachment Method |
|---|---|---|
| Asphalt Shingle | 15-20 lbs per sq ft | Reinforced Bracket System |
| Metal Roof | 25-30 lbs per sq ft | SkyLift Roof Riser |
| Flat Concrete Roof | 40-50 lbs per sq ft | Direct Mounting |
Essential Safety Requirements
Safety is always first when installing a pergola. Always get a professional structural engineer’s opinion. They can check your roof and ensure the right attachment.
Using the right brackets and installation methods makes your pergola safe and lasting. It will also improve your home’s look and function.
Essential Tools and Materials for Pergola Installation
When planning a secure pergola structure, having the right tools and materials is key. I’ll guide you through the essential equipment needed for a sturdy and reliable pergola attachment.

- Impact driver with adjustable torque settings
- Professional-grade measuring tape
- Sturdy extension ladder
- Safety harness
- Drill with multiple bit sizes
- Level for precise alignment
Your materials list for a reliable pergola attachment should include:
- Corrugated roof panels
- Enclosure strips
- High-quality silicone roof sealant
- Stainless steel roofing screws
- Waterproof mounting brackets
- Protective rubber washers
Pro tip for pergola anchoring tips: Always choose high-quality materials that can handle local weather. Stainless steel components resist rust and ensure your pergola lasts long.
Read also: Silicone Roof Coating Pros and Cons?
Safety is most important. Before starting, make sure all tools work well and you have the right protective gear.
Preparing Your Roof for Pergola Installation
Before you start installing a pergola, you need to prepare your roof. Choosing the right roof connection methods is key. First, check if your roof can handle the pergola’s weight and plan where to attach it.

Getting your roof ready involves several important steps. You must ensure the pergola is attached safely and securely. The weight your roof can hold is a big factor in your project’s success.
Examining Roof Structure
Start by checking your roof’s frame carefully. Look for these important parts:
- Roof trusses or rafters
- Existing support beams
- Potential weak points or damage
Read also: Truss Roof vs. Rafters
Marking Installation Points
When marking where to attach your pergola, be precise. Follow these steps to find the best spots:
- Find the main structural supports
- Measure and mark where to attach
- Check if everything is aligned and spaced right
Removing Roofing Materials
Removing roofing materials needs special care to avoid damage:
| Material Type | Removal Technique | Recommended Tools |
|---|---|---|
| Asphalt Shingles | Gentle prying | Pry bar, roofing knife |
| Metal Roofing | Careful lifting | Metal snips, protective gloves |
| Tile Roofing | Individual tile removal | Tile puller, replacement tiles |
Be patient during this step. Every roof is different. With careful preparation, your pergola will look great and last for many years.
How to Attach a Pergola to a Roof: Step-by-Step Guide
Attaching a pergola to your roof needs precision and planning. As someone who loves DIY pergola projects, I’ll show you how to do it right. This way, you’ll get a secure and professional setup.
- Drill and drill bits
- Measuring tape
- Level
- Lag bolts
- Washers
- Protective safety gear
Here are the main steps to attach a pergola to your roof:
- Find and mark the roof rafters carefully
- Drill pilot holes to avoid damaging the roof
- Put in heavy-duty mounting brackets
- Use lag bolts to secure the pergola posts
- Check that everything is level and aligned
Professional tip: Use waterproof sealant around bolt holes to stop leaks. Make sure your roof can handle the pergola before you start.
Remember, safety is key when doing a DIY pergola project. If you’re not sure about anything, get help from a professional. They can make sure your pergola is attached well and lasts a long time.
Installing Roof Risers and Support Systems
Building a strong pergola needs careful planning and the right support systems. The right roof-to-pergola hardware is key to keeping your outdoor space stable and safe for years.

When setting up roof risers, focus on three main things. These are positioning base plates, securing lateral stabilizer straps, and adding extra reinforcement.
Positioning Base Plates Correctly
Where you place the base plates is very important for a stable pergola. Here’s what to do:
- Find solid roof framing members
- Use special mounting brackets for roof connections
- Make sure it’s level and the weight is evenly spread
- Drill pilot holes before screwing to avoid roof damage
Securing Lateral Stabilizer Straps
Lateral stabilizer straps help protect against wind and movement. Here’s how to do it:
- Choose strong stainless steel straps
- Attach straps at several points
- Use hardware that won’t rust
- Tighten the straps to stop any movement
Adding Reinforcement Measures
To make your pergola even stronger, try these extra steps:
- Put in diagonal bracing
- Use heavy-duty lag bolts
- Seal weatherproof at connection points
- Check and tighten hardware often
By following these steps, you’ll build a sturdy pergola. It will last through many weather changes and give you years of outdoor fun.
Weatherproofing Your Pergola Connection
Keeping your pergola’s roof connection safe is key. Water damage can ruin your outdoor space. So, let’s explore ways to keep your pergola dry and strong.
Choosing the right materials and installation methods is the first step. Roof connections need special care to avoid water leaks. Here are some important steps for weatherproofing:
- Install high-quality roof boots around attachment points
- Apply waterproof sealant to all connection joints
- Use flashing aprons to redirect water away from attachment areas
- Reinstall or repair roofing underlayment around pergola connection points
When putting on roof boots, ensure they fully cover the brackets. These boots make a tight seal to keep moisture out. Always use top-notch silicone sealant for extra protection.
Flashing aprons are a great tool for a weatherproof pergola. They’re metal or rubber strips that keep water away from important spots. It’s vital to match them with your roof’s design for the best protection.
Spending time on weatherproofing now can save you a lot of money later. A well-protected pergola means your roof and pergola stay safe from harm.
Dealing with Different Roof Configurations and Bump-outs
Adding a pergola to your home can be tricky. Not all roofs are the same. This guide will help you solve problems with roof shapes and bump-outs.
Roof shapes can be a challenge for pergola installation. Each unique feature needs a special approach. This ensures a strong and stable connection.
Square Bump-out Solutions
Square bump-outs need careful planning. Here are some tips:
- Measure the bump-out dimensions precisely
- Create custom support brackets
- Use triangle-shaped wood wedges for additional stability
Angled Wall Attachments
Angled walls are tricky for pergola installation. Consider these tips:
- Use adjustable mounting brackets
- Ensure proper weight distribution
- Check for structural integrity before installation
Spacing Adjustments
Spacing is key for a good pergola installation. Here’s a guide for different roof types:
| Roof Type | Recommended Spacing | Support Method |
|---|---|---|
| Standard Flat Roof | 16-24 inches | Rafter Mounting Brackets |
| Sloped Roof | 12-18 inches | Adjustable Risers |
| Bump-out Sections | Custom Spacing | Specialized Support Frames |
With these tips, you can tackle any roof challenge. Remember, patience and planning are essential for a great pergola installation.
Maintenance and Long-term Care of Roof-Attached Pergolas
Keeping your roof-attached pergola in top shape needs regular care. After putting in the effort to make it secure, keeping it up is key. This ensures it lasts long and works well.
It’s smart to have a plan for taking care of your pergola. Focus on a few important areas:
- Inspect pergola anchoring tips and connection points quarterly
- Check for any signs of wear or loosening in the weatherproof pergola connection
- Clean the structure to prevent debris accumulation
- Assess structural integrity annually
The SkyLift system helps a lot by stopping debris from getting stuck. When you check things out, look closely at:
- Metal fasteners and connection points
- Potential water damage or rust
- Seal integrity around attachment areas
- Wood or material condition
Seasonal upkeep is vital for your pergola’s health. In spring and fall, do detailed checks to spot problems early. Use the right cleaners and apply protective coatings when needed.
By sticking to these care tips, your roof-attached pergola will stay beautiful and useful for many years.
Conclusion
I’ve shown you how to attach a pergola to a roof, from planning to installation. This guide has given you the key knowledge to make your outdoor space better. It’s safe and effective.
Building a strong pergola takes time, care, and attention to detail. The steps might look hard, but breaking them down makes it doable. Knowing your roof well is essential for a good job.
Read also: Painting a Metal Roof
If you’re unsure about any part of the process, get help from a pro. A contractor can avoid problems and make sure your pergola is safe and looks great for years.
With the right tools, knowledge, and plan, you can add a pergola to your roof. It will make your outdoor area beautiful and useful. Enjoy your new outdoor space!


