Do you have an old roof that’s losing its protection? Many homeowners deal with worn-out 3 tab shingles. These shingles can lead to water damage and even harm the structure of your home.
Installing architectural shingles is a great way to fix this problem. My guide will show you how to do it yourself. This will make your roof better and look great, all while saving you money and keeping your home safe.
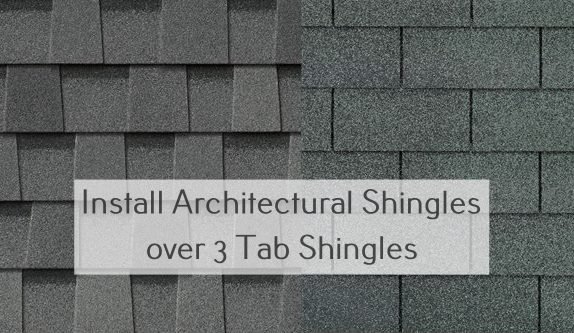
Understanding Architectural Shingles and Their Benefits
Choosing the right roofing materials is key for your home’s safety and look. Architectural shingles are a top choice for those wanting a better roof. They are durable and look great.
Read also: Are Architectural Shingles Worth Extra Cost
Architectural shingles are a big step up from 3-tab shingles. They keep water out better and protect your home more. They are a premium option.
Key Advantages of Architectural Shingles
- Increased durability and wind resistance
- More attractive dimensional appearance
- Longer lifespan (up to 30 years or more)
- Better protection against weather damage
Structural Considerations for Double Layer Roofing
Putting architectural shingles over old ones might be smart. But, you must think about your roof’s strength first. The extra weight could be a problem.
Assessing Your Current Roof Condition
Before you start, check your roof well. Look for damage, water spots, or weak spots. These could affect the new shingles.
| Roof Condition Assessment | Recommended Action |
|---|---|
| Minor surface damage | Possible overlay installation |
| Significant structural issues | Complete roof replacement recommended |
| Multiple layer buildup | Remove existing layers before installation |
It’s wise to talk to a roofing expert. They can check if your roof is ready for architectural shingles. Their advice will help protect your home for years.
Essential Tools and Materials for Shingle Installation
Installing architectural shingles needs specific tools for a professional finish. Before you start, let’s go over the key equipment and materials needed.

Your toolkit should have important items for a smooth and safe job. Make sure to gather these tools:
- Measuring tape for accurate measurements
- Chalk line for precise alignment
- Utility knife with extra blades
- Hammer or pneumatic roofing nailer
- Pry bar for removing old materials
- Roofing shovel
- Sturdy ladder
- Safety harness
- Work gloves
- Roofing adhesive
Choosing the right roofing nails is key. Use galvanized steel nails that go through shingles and the roof deck. Nails between 1¼-inch and 1½-inch are usually best for architectural shingles.
Safety is always first. Get a good safety harness, non-slip boots, and eye protection. These might cost more, but they’re vital for avoiding accidents.
Professional roofers know the right tools are essential. By preparing your toolkit and choosing quality materials, you’ll ensure a successful shingle installation.
Preparing Your Roof Deck for New Shingles
Before starting your roofing project, it’s key to prepare your roof deck well. This ensures a smooth installation of new shingles. Let’s go over the important steps to get your roof deck ready.
Inspecting the Existing 3-Tab Surface
Inspecting your roof deck is the first step to a great roofing job. I suggest a detailed check of your current 3-tab shingle surface. Look for any problems:
- Check for visible signs of water damage
- Look for warped or rotting plywood
- Assess the overall structural integrity of the roof deck
- Identify any areas with soft spots or structural weakness
Addressing Damage and Repairs
Roofing safety starts with a strong foundation. When getting ready for new shingles, fix any damaged plywood right away. Replace bad areas with new plywood. This makes sure your roof is ready for the new shingles.
Setting Up Safety Equipment
Keep yourself safe while preparing your roof deck. You’ll need:
- Sturdy fall protection harness
- Non-slip roofing shoes
- Safety glasses
- Work gloves
- Hard hat
Spending time on roof deck prep ensures your shingles go on smoothly. This also means your home will be well-protected for years.
How to Install Architectural Shingles over 3 Tab Shingles

Installing new shingles needs careful planning and precise steps. Before starting, make sure you have all the materials and a clean, stable area. Always put safety first in this home improvement task.
First, prepare the roof deck well. Remove any loose debris and check for damage. You need a smooth, even base for your new shingles. This step is key for a long-lasting roof.
- Clean the existing roof surface completely
- Check for any structural damage or weak spots
- Repair any compromised areas before installation
- Ensure proper ventilation is maintained
For successful installation, follow a systematic approach. Start at the roof’s bottom edge and move up, overlapping each row carefully. Precision is key to prevent water damage and ensure protection.
| Installation Step | Key Considerations |
|---|---|
| Surface Preparation | Remove old materials, repair deck, clean surface |
| Underlayment Application | Install water-resistant barrier completely |
| Starter Strip Placement | Align carefully at roof’s bottom edge |
| Shingle Positioning | Overlap carefully, maintain consistent pattern |
Focus on nailing techniques. Use the recommended pattern to secure each shingle. Wrong nailing can harm the roof and void your warranty.
Patience and careful attention are essential when installing shingles. Take your time to ensure a professional-quality result. This will protect your home for many years.
Installing the Starter Strip and First Course
When you put architectural shingles over old 3-tab shingles, getting the first course right is key. I’ll share the top shingles alignment tips and shingle overlap technique. These will help build a strong base for your roofing project.
Before starting, use a chalk line to draw precise horizontal guides. These lines keep your courses straight and prevent misalignment. This is important for your roof’s strength.
Starter Strip Placement
The starter strip is the first layer of your roof. Here’s what to do:
- Place the starter strip right at the roof’s edge
- Make sure it overhangs the drip edge by 1/2 inch
- Use roofing nails 6-8 inches apart
Shingle Overlap Technique
Learning the shingle overlap technique is vital for a watertight roof. Each shingle should overlap the one below by 5-6 inches. This stops water from getting in and keeps your roof weatherproof.
Read also: How Much Does a New Roof Increase Home Value?
Nailing Recommendations
Proper nailing is key for shingle performance. Use four to six roofing nails per shingle, in the right spot. This boosts wind resistance and makes your roof last longer.
Proper Shingle Layout and Pattern Techniques

Understanding proper shingle layout is key for both looks and function. I’ll share the top techniques used by pros for perfect shingle installation.
Mastering shingle positioning is vital. Begin with a full course of shingles and adjust their placement. Use small cut marks on shingles for precise alignment.
- Utilize the stair-step pattern for consistent coverage
- Maintain uniform shingle exposure across the roof
- Use cut marks as alignment reference points
- Check horizontal and vertical alignment carefully
Two main techniques are used in roofing guides: stair-step and racking. The stair-step method ensures even water flow and looks great. It’s my go-to for homes as it protects against water damage.
Read also: Advantages & Disadvantages of Aluminum Roofing
When dealing with tricky roof spots like valleys and hips, planning is key. Take your time to cut and place shingles for a seamless look and to prevent leaks.
A good shingle layout not only looks great but also makes your roof last longer. It keeps water out and ensures proper drainage.
Handling Roof Penetrations and Flashing
Proper roof installation needs careful attention to where different parts meet. Roof underlayment is key for areas like vents, chimneys, and other features. These spots can weaken water resistance.
I’ll show you how to make watertight seals in these tricky spots. Keeping your roof safe from water damage starts with knowing how to handle these key areas.
Working Around Vents and Chimneys
Here are the important steps for shingles around roof penetrations:
- Always position flashing to create a water-resistant barrier
- Ensure shingles overlap flashing correctly
- Apply roofing cement for additional protection
- Check alignment carefully to prevent water infiltration
For plumbing vent pipes, use a special method. Shingle up to the pipe, then apply roofing cement. Slip the flashing over the pipe for a tight seal.
Valley and Edge Treatment Methods
Roof valleys are another key area where underlayment is vital. They handle a lot of water and need extra care.
- Use specialized valley flashing materials
- Ensure proper overlap of shingles
- Apply additional sealant in high-risk areas
- Maintain consistent slope for water drainage
By using these methods, you’ll protect your roof from water damage. This ensures your roof stays safe for many years.
Ridge Cap Installation and Final Touches

As we wrap up our roofing guide, we focus on ridge caps. These are key for the roof’s peak and give your roof a clean, finished look.
To get ready for ridge cap installation, follow these steps:
- Turn standard shingles upside down
- Cut off individual tabs carefully
- Create slight angle cuts to hide non-reveal portions
Installing ridge caps needs precision. I use a chalk line for straight alignment. This ensures a neat, even look on your roof.
Proper nailing is essential in our guide. Each ridge cap shingle needs specific nail placement:
- Position nails 1 inch from each end
- Space additional nails every 6 inches
- Ensure nails are flush and secure
For extra protection, I apply roofing sealant under each ridge cap. This step helps keep your roof dry and extends its life.
Remember, installing ridge caps is the last step to make your roof stand out. Take your time and follow these tips for a professional finish that will protect your home for years.
Weather Considerations and Installation Tips
Installing architectural shingles needs careful planning, thanks to changing weather. Roofing safety is key during different seasons. Knowing how weather affects your project helps you work safely and efficiently.
Temperature is very important for roofing safety. The best time to install shingles is between 40°F and 85°F. Very hot or cold weather can harm the materials and the workers.
- Hot Weather Precautions:
- Start work early in the morning
- Stay hydrated
- Use protective clothing and sunscreen
- Cold Weather Considerations:
- Check manufacturer’s temperature guidelines
- Store shingles in a warm area before installation
- Use specialized adhesive for cold conditions
Wind is another big challenge for roofing safety. Always make sure your workspace is secure. Use proper fall protection gear on steep or high surfaces.
| Weather Condition | Safety Recommendation |
|---|---|
| High Winds | Use roof jacks and safety harnesses |
| Rain/Moisture | Postpone installation, protect exposed roof deck |
| Extreme Heat | Work during cooler hours, take frequent breaks |
Your safety is the most important thing. If the weather is not safe, wait for better conditions before starting your roofing project.
Read also: How to Use Roof Jacks and Install It in Easy Ways
Conclusion
As we wrap up this guide on architectural shingles installation, it’s key to highlight its importance. Installing these shingles over old ones needs careful planning and precision. It’s not just about the work itself but also the details.
Some homeowners might think they can handle it themselves. But, architectural shingles installation can be tricky. Professionals have the skills to do it right, ensuring safety and a long-lasting roof. It’s wise to think about your skills and the project’s needs before deciding to DIY or hire a pro.
Your new architectural shingles are a big investment in your home’s safety and looks. Keeping up with maintenance, like yearly checks and quick fixes, is vital. This way, your roof will last longer and keep your home safe.
Whether you go for professional help or do it yourself, this guide has given you valuable insights. Knowing how to install architectural shingles will help you keep your roof strong and looking good. It will also boost your home’s value and safety.


