Are you tired of leaky, deteriorating shed roofs that can’t withstand harsh weather? Many homeowners struggle with roof damage. This leads to costly repairs and frustrating maintenance. Corrugated metal roofing offers a robust solution.
My guide to install corrugated metal roofing will walk you through every step. Whether you’re a DIY enthusiast or a weekend warrior, this tutorial will equip you. You’ll learn the skills to successfully complete your metal roofing on a shed project.
Get ready to upgrade your shed’s protection. Learn how simple installing corrugated metal roofing can be with the right approach and techniques.

Understanding Corrugated Metal Roofing Benefits
Corrugated metal roofing is a top pick for protecting your shed. I’ve worked with many materials, and metal roofing always shines for outdoor use. Here’s why it’s a big win for shed owners.
Durability That Stands the Test of Time
Corrugated metal roofing is incredibly durable for your shed. It beats out other materials in handling tough weather. My experience shows these roofs can:
- Withstand intense sunlight and heat
- Handle heavy snow loads
- Resist powerful wind gusts
- Keep out torrential rain
Cost-Effectiveness and Long-Term Savings
Though metal roofing might cost more upfront, the long-term savings are huge. A corrugated metal roof can last 40-70 years. This means you’ll need fewer replacements and spend less on upkeep for your shed.
Environmental Advantages
Metal roofing is not just practical—it’s also good for the planet. These roofs are often made from recycled materials and can be fully recycled when they’re done. Plus, their reflective surface can lower cooling costs by reflecting sunlight. It’s a smart, eco-friendly choice for your shed.
Choosing corrugated metal roofing means you’re picking a durable, cost-effective, and green solution.
Essential Tools and Materials Needed
Getting ready for a metal roof installation means you need the right tools and materials. I’ve learned that the right equipment makes the job easier and looks better.
Before you start your shed roofing project, you’ll need some important tools:
- Measuring tape for accurate dimensions
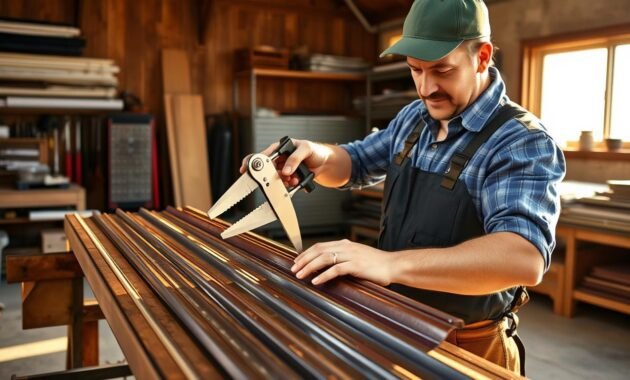
- Metal snips for precise cutting of roofing materials
- Adjustable-torque handheld drill
- Ladder for safe roof access
- Safety gear (gloves and eye protection)
- Caulking gun for sealing
- Hammer
For the roofing materials, you’ll need:
- Corrugated metal panels
- Roofing screws
- Underlayment
- Sealant
- Ridge caps
| Tool Category | Specific Tools | Purpose |
|---|---|---|
| Cutting Tools | Metal snips | Precise panel trimming |
| Fastening Tools | Adjustable-torque drill | Secure panel installation |
| Safety Equipment | Protective gloves, safety glasses | Personal protection |
Quality tools and materials are key for a successful metal roof installation. Make sure to gather everything before you start. This will help you avoid any delays.
Preparing Your Shed for Metal Roof Installation
Before starting your diy roofing project, it’s important to prepare well. A good surface means your metal roof will last long and not leak.
Inspecting Structural Integrity
I always check the shed’s framework first. Look for these signs of problems:
- Warped or rotting wooden supports
- Uneven roof decking
- Signs of water damage or structural weakness
- Loose or compromised framing connections
Removing Old Roofing Materials
Getting rid of the old roof is key for metal roofing. Here’s how I do it:
- Remove all existing shingles or roofing materials
- Inspect underlying decking for damage
- Replace any deteriorated wood panels
- Ensure a clean, smooth surface
Cleaning and Surface Preparation
A clean surface is vital for metal roof installation. I use these steps to get it ready:
- Power wash the roof decking
- Remove all debris and loose particles
- Sand down any rough spots
- Apply a moisture barrier if needed
By doing these steps, you’ll set up your shed for a great metal roof. It will look professional and last a long time.
Measuring and Calculating Material Requirements
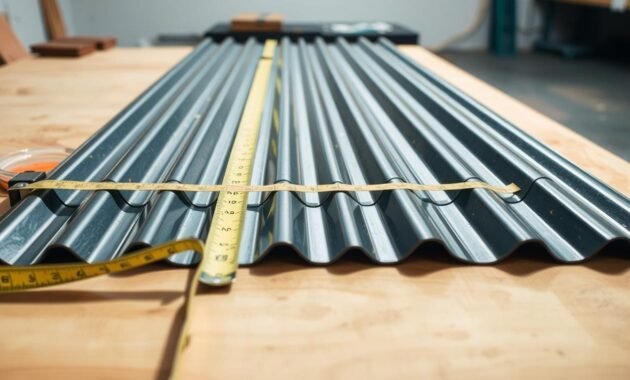
Starting a metal roofing shed project needs precise measurements and planning. It’s important to get the right amount of corrugated roofing panels. This avoids extra costs and installation problems.
Read also: How to Insulate a Shed Roof and a Metal Roof
I’ll show you how to figure out the materials you need for your metal roofing shed. Accurate measurements save time, money, and headaches during installation.
Roof Measurement Basics
To find out how many corrugated roofing panels you need, follow these steps:
- Measure the total roof area
- Calculate the square footage of each panel
- Figure out how many panels you’ll need
- Add extra panels for cuts and mistakes

- Multiply the roof’s length by its width to find the total square footage
- Check how much area each corrugated roofing panel covers
- Divide the total roof area by the panel’s coverage
Material Quantity Estimation
I suggest buying about 10-15% more roofing materials. This covers waste, complex cuts, and unexpected issues during installation.
| Roofing Material | Quantity Calculation Method | Recommended Extra |
|---|---|---|
| Corrugated Panels | Total Roof Area ÷ Panel Coverage | 10-15% |
| Fasteners | Panels × Fasteners Per Panel | 20% |
| Underlayment | Roof Square Footage | 5-10% |
By measuring and planning your roofing materials carefully, you’ll have a smooth metal roofing shed installation.
How to Install Corrugated Metal Roofing on a Shed
Installing corrugated metal roofing can make your shed stronger and look better. As someone who loves DIY, I’ll show you how to do it step by step. It’s important to follow the right steps to make a roof that lasts and keeps out the weather.
First, get all the materials you need and make sure your surface is clean and ready. The success of your roof depends on how well you prepare and do the job.
Starting at the Eave Line
Start at the bottom corner of your shed roof when installing corrugated metal. Here’s what to do first:
- Place the first panel at the roof’s bottom edge
- Make sure there’s at least a 4-inch overhang to keep water away
- Align the panel well to start a straight line
Proper Panel Overlap Techniques
It’s key to overlap panels right to stop water from getting in. Here’s how to do it right:
- Overlap panels by at least 6 inches horizontally
- Make sure vertical overlaps cover at least one full corrugation
- Keep the pattern the same all over the roof
| Overlap Type | Recommended Measurement | Purpose |
|---|---|---|
| Horizontal Overlap | 6 inches minimum | Prevent water penetration |
| Vertical Overlap | 1 full corrugation | Ensure complete coverage |
Securing Panels with Fasteners
When you install corrugated metal roofing, fastening is key. Here’s how to fasten your panels:
- Choose screws that are weather-resistant for metal roofing
- Put fasteners about 12-18 inches apart
- Avoid tightening too much to not damage the metal
- Use rubber washers for a tight seal
By using these steps, you’ll make a strong, leak-free roof for your shed. It will last for many years.
Installing Ridge Caps and Flashing
After you’ve put the main metal roofing on your shed, you need to focus on ridge caps and flashing. These parts are key to keeping your shed dry and safe from weather damage.
Ridge caps seal the roof’s peak. I suggest using special strips for a snug fit. Make sure to overlap them right to keep water out.
- Align ridge caps precisely at the roof’s peak
- Ensure a minimum 2-inch overlap between cap sections
- Use specialized roofing screws with rubber washers
- Apply silicone sealant along the eave rake edging
Flashing is also vital for your metal roofing. It’s used around vents or chimneys to keep water away. This helps prevent leaks.
| Flashing Type | Recommended Use | Installation Complexity |
|---|---|---|
| Pipe Flashing | Roof pipe penetrations | Low |
| Valley Flashing | Roof intersection points | Medium |
| Step Flashing | Wall and roof intersections | High |
By installing ridge caps and flashing right, you’ll make your metal roofing last longer. Your shed will stay safe from water damage.
Sealing and Waterproofing Techniques
Keeping your metal roof dry is key to its long life and good performance. A good waterproofing plan stops leaks, rust, and damage to your shed.
Applying Sealants and Caulking
For metal roof care, silicone sealant fights off water. I suggest applying it carefully at:
- Seams between metal roofing panels
- Ridge cap connections
- Fastener penetration points
- Edges and corners of the roof
Read also: Can You Put a Metal Roof Over Shingles?
Weather Barrier Installation
A strong weather barrier adds extra protection to your metal roof. It keeps water out of your shed’s structure.
- Clean the roof surface thoroughly
- Measure and cut the weather barrier precisely
- Ensure complete coverage with minimal overlaps
- Secure the barrier using recommended fastening techniques
Ventilation Considerations
Good ventilation is vital when installing ventilation pipes. I recommend a balanced system that lets moisture out while keeping the roof safe.
- Use ridge vents for optimal air circulation
- Ensure proper spacing between ventilation openings
- Check that ventilation does not compromise waterproofing
By using these sealing and waterproofing methods, you’ll protect your metal roof from moisture. This keeps it in great shape for many years.
Proper Panel Cutting and Trimming Methods

When you’re installing corrugated roofing panels, cutting them right is key. I’ll show you how to trim your metal panels accurately and safely.
First, make sure you have the right tools. Your toolkit should include:
- Tin snips
- Protective gloves
- Safety glasses
- Measuring tape
- Marking pencil
Measuring is important when you’re installing corrugated metal roofing. Always remember to “measure twice, cut once.” This helps avoid waste and ensures your cuts are precise. Use a straight edge or chalk line to mark your cuts clearly on the panels.
For straight cuts, tin snips are perfect. But for curved or complex cuts, like around vents or skylights, use power shears or a circular saw with a metal blade. Always wear protective gear and work in a well-ventilated area.
Pro tip: To avoid scratches from metal shavings, file down the edges after cutting. This step makes your installation look professional and clean.
Maintenance and Care Tips
Keeping your corrugated metal roof in top shape is easy. Just follow a few simple steps. This way, your roof will look great and work well for decades.
It’s important to check your roof often. I suggest doing this at least twice a year. Spring and fall are good times to do it. Look for these things during your checks:
- Loose or damaged fasteners
- Signs of rust or corrosion
- Debris accumulation
- Potential water drainage issues
Cleaning your roof is easy. Use a soft brush or a low-pressure water spray to get rid of dirt. Don’t use harsh chemicals or rough tools that could harm the coating.
Fixing small problems early is key. Use metal roof sealants for minor issues like loose screws or small scratches. For bigger problems, get help from a metal roofing expert.
Keeping plants away from your roof is also important. Trim tree branches to stop them from scratching your roof. Also, remove moss or algae right away.
Read also: 4 Simple Tricks on How to Keep Birds away from Roof
- Check fasteners every 2-3 years
- Reapply protective coating as needed
- Clear gutters and drainage systems
By following these tips, your metal roof will stay strong and look good for years. It will be a great part of your roofing shed.
Conclusion
Installing corrugated metal roofing on a shed can make it look great and last long. In this guide, we covered everything from the benefits to the technical steps. You now know how to fit panels correctly.
Choosing corrugated metal roofing means your shed will be strong and safe for a long time. The methods we talked about will make your shed weatherproof and look good.
Installing metal roofing on a shed needs patience, precision, and prep. By using this guide, you’ll feel ready to start your project. Your shed will be more useful and look better.
When you finish, be proud of your work. Your new metal roof will protect your shed for many years. It will keep your shed and its stuff safe and dry.


