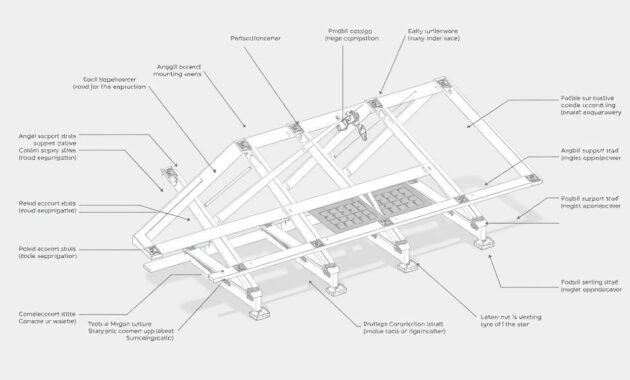
Are you having trouble with your roof and finding water damage? Many homeowners struggle with their roof’s exposed part, leading to big problems. The roof rake is key in keeping your home safe from water damage and structural issues.
A roof rake is more than just a roof feature. It’s the sloped edge of your roof, from the eaves to the ridge. It helps manage water flow and protects your roof. Knowing about it can save you a lot of money and prevent serious damage.
I’ll guide you through the world of roof rakes. We’ll talk about their importance, design, and how they protect your home. By the end, you’ll know how this important part keeps your home safe and looking good.
See also : Choose 5 Main Low Sloped Roof Options
Understanding Roof Rake Definition and Basic Functions
A roof rake is key to keeping your home safe and dry. It helps manage water and protects your home’s structure. It’s more than just a design feature.
The roof rake does more than look good. It’s vital for keeping water away from your home’s exterior. This is a big part of roof edge protection.
Key Components of a Roof Rake
A roof rake has important parts that work together:
- Rake board: Provides structural support along the roof’s edge
- Drip edge: Directs water away from the fascia board
- Underlayment: Offers additional moisture barrier protection
Role in Roofing System Protection
The roof rake’s main job is to stop water damage. It guides water and snow away from your home. This keeps your home safe from moisture problems.
| Component | Function | Protection Level |
|---|---|---|
| Rake Board | Structural Support | High |
| Drip Edge | Water Diversion | Medium-High |
| Fascia Board | Edge Reinforcement | Medium |
Structural Support Features
Roof rafters and the rake work together. They spread out the weight of roofing materials. This keeps your roof stable and strong for years.
Knowing about roof rake design helps homeowners see the engineering that protects their homes. It’s a vital part of keeping your home safe.
What is a Rake on a Roof: Complete Breakdown

Knowing about the roof rake is key for homeowners. It helps keep water away and makes the roof stronger. The roof rake is the sloping edge of a gable roof. It goes from the eave to the ridge, helping manage water and adding to the roof’s look.
The roof rake has important features for home safety:
- It guides rainwater and melting snow away from the roof edges.
- It stops moisture buildup and damage to the roof.
- It also makes the home look better.
In gable roofs, the rake does more than just direct water. It helps with the roof’s slope by smoothing out the transition. This is very important in places with lots of snow or rain.
Roof rake materials vary, each with its own benefits:
- Aluminum is light and great for snow.
- Asphalt shingles are affordable and versatile.
- Fiber cement boards are strong and look good.
Roofing pros say to check the roof rake often. This helps avoid problems like ice dams, moisture, and roof damage.
Essential Elements of Roof Rake Design
Designing a roof rake requires careful thought about many factors. These factors affect both how well it works and how it looks. The right design can make a house look better and protect it from the weather.
Homeowners have many choices when it comes to roof rake materials. Each material has its own strengths and weaknesses. They affect how long the rake lasts and how well it performs.
Materials Used in Rake Construction
- PVC: Lightweight and resistant to moisture
- Cedar: Natural aesthetic with excellent weather resistance
- Pine: Cost-effective and widely available
- Concrete: Extremely durable for structural applications
- Smartboard: Modern synthetic material with high longevity
Different Rake Styles and Configurations
Roof rake styles greatly affect a home’s look. There are a few main types:
- Exposed rakes: Visible framing, popular in Craftsman-style homes
- Closed rakes: Sleek, concealed design with minimal external elements
- Overhanging rakes: Extended designs providing additional protection
Impact on Home Architecture
Choosing the right roof rake design is more than just practical. Architects say to pick a style that fits your home’s look. For example, clipped rakes are great for Cape-style and modern homes.
Building codes say roofs must handle up to 30 pounds per square foot. So, installing roof rakes correctly is key for your home’s safety. The rake’s width and depth can also add to your home’s beauty.
Roof Rake vs Other Roofing Components
It’s important for homeowners to know the difference between roof rake and other roofing parts. Each part has its own role in keeping your home safe and looking good.

Here’s a look at what makes roof rakes different from other important parts:
- Roof Rake vs Eave:
- Rakes run perpendicular to the roof slope on gable ends
- Eaves extend horizontally beyond the home’s exterior walls
- Rakes connect gable ends to outer eaves
- Rake Boards vs Fascia Boards:
- Rake boards are typically wider and more decorative
- Fascia boards run horizontally and support gutter systems
- Rake boards focus on aesthetic edge definition
- Fascia boards provide critical structural support
What they’re made of also sets them apart. Rake boards can be wood, vinyl, or composite. Fascia boards are usually wood, aluminum, or PVC. Rakes help keep water away from gable ends. Fascia boards help manage water flow through gutters.
| Component | Primary Function | Typical Materials |
|---|---|---|
| Roof Rake | Aesthetic edge protection | Wood, Vinyl, Composite |
| Fascia Board | Structural gutter support | Wood, Aluminum, PVC |
Keeping these parts in good shape is key. Regular checks can stop water damage, reduce leaks, and make your roof last longer.
Read also: How Long Should a Roof Last
Benefits of Proper Rake Installation
Roof rake installation gives homeowners big advantages. It’s not just about looks. It helps keep your home safe and working well against the weather.
Weather Protection Advantages
A good roof rake keeps your home safe from bad weather. It goes beyond the walls to stop water from getting in. It also helps move snow and rain away from your home.
- Prevents water from seeping under roofing materials
- Supports effective snow and rain management
- Reduces the chance of ice dams forming
Aesthetic Value Enhancement
Roof rakes also make your home look better. A well-installed rake adds balance and beauty. Using materials like galvanized steel or aluminum keeps it looking good for a long time.
Structural Integrity Support
Installing a roof rake right is key to keeping your roof strong. It helps keep your roof materials in place and stops wind from lifting them. This makes your home’s outside last longer.
| Benefit Category | Key Advantages |
|---|---|
| Weather Protection | Prevents water infiltration, manages moisture drainage |
| Aesthetic Enhancement | Creates visual symmetry, improves architectural appeal |
| Structural Support | Prevents wind uplift, supports roofing material attachment |
Getting a roof rake installed by pros is a smart move. It protects your home, makes it look better, and keeps it strong for years to come.
Common Roof Rake Issues and Solutions
Keeping your roof rake in good shape is key to your home’s safety. Homeowners often face problems with roof rakes that can harm the roof’s edge and materials.
Knowing about these issues can help avoid expensive fixes and make your roof last longer. Here are the most common problems and how to fix them:
- Moisture Damage: Water can cause big problems
- Ice Dam Formation: A big issue in cold areas
- Pest Infiltration: Pests can get in through roof rakes
- Material Degradation: Materials can rot and weaken
Some big worries with roof rakes include:
| Issue | Impact | Prevention Strategy |
|---|---|---|
| Water Damage | Structural problems | Install drip edge, ensure overlap |
| Pest Infiltration | Home damage | Seal gaps, use mesh |
| Material Decay | Shorter roof life | Regular checks, replace when needed |
Preventive roof rake care can stop up to 50% of damage. Homeowners should check their roof twice a year, after bad weather. Look for moisture, gaps, or worn-out materials.
When DIY fixes don’t work, it’s time to call a pro. Experts can handle serious problems like structural damage or water damage to save you money in the long run.
- Inspect roof rakes twice yearly
- Look for water damage signs
- Seal entry points
- Replace damaged materials quickly
By knowing about roof rake problems and taking care of them, you can keep your home safe and avoid expensive fixes.
Maintenance Tips for Roof Rakes
Keeping your roof rake in good shape is key to your home’s safety. It helps avoid costly repairs and keeps your roof lasting longer.
For roof rake care, focus on a few important steps. These steps help keep your roof rake working well and protect your roof’s edge.
Seasonal Care Guidelines
Seasonal care is vital for roof rake upkeep. Here’s what I suggest for each season:
- Spring: Check for winter damage after the snow melts
- Fall: Clean your roof rake for winter
- Summer: Look for wear from weather
- Winter: Watch for snow and ice dams
Professional Inspection Requirements
Getting your roof rake checked by pros is a must. Here’s why:
- Get inspections twice a year
- Check after bad weather
- Get an expert if you see damage
Repair and Replacement Indicators
Spotting roof rake problems early is important. Look out for these signs:
- Warping or cracks in the rake boards
- Loose or rusted fasteners
- Water damage or moisture
- Debris that won’t go away
By following these tips, you can keep your roof safe and avoid expensive fixes.
Enhancing Your Home’s Appeal with Roof Rake Design
Changing your home’s look starts with the roof edge design. The roof rake is more than just useful; it’s a design statement. It can make your home look much better. With over 15 materials to choose from, you can make your roof rake unique.
When picking roof rake materials, think about these important points:
- Color coordination with exterior siding
- Architectural style compatibility
- Weather resistance characteristics
- Durability and maintenance requirements
Roof rake benefits go beyond looks. A well-designed roof rake can increase your home’s value by up to 10%. Choosing materials like cedar, aluminum, or composite means you’re getting both protection and style.
Here are some tips to make the most of your roof rake:
- Select materials that match your home’s style
- Choose colors that make your home look good
- Pick materials that can stand up to the weather
- Think about how easy it is to maintain
Getting a pro to install your roof rake ensures it looks great and works well. With the right choice, your roof rake can be a highlight of your home.
Conclusion
Exploring roof rakes has shown their deep importance in protecting homes. They do more than just look good; they are key to keeping a home strong. Roof rakes shield against moisture, wind, and other environmental dangers.
The benefits of roof rakes are clear when we see how they work. They stop water from getting in and help save energy. With choices like wood, metal, and PVC, homeowners can pick what works best for them.
Keeping roof rakes in good shape is essential. Homeowners should check them twice a year, before and after winter. This care helps keep our homes safe and efficient.
Knowing how roof rakes work makes them more than just parts of a house. They are vital for a safe and cozy home. Smart homeowners see their value in keeping our homes strong and comfortable.


