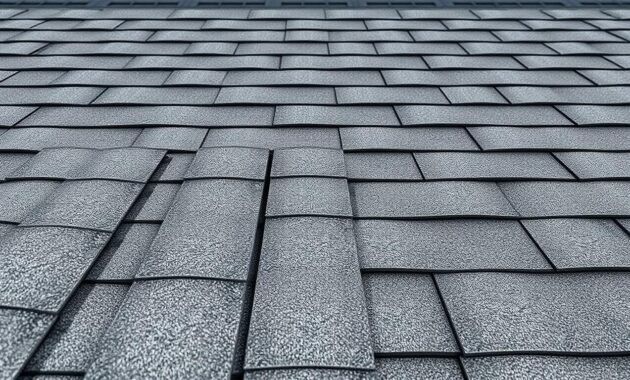
Trying to install roof shingles can be a big headache. It involves heavy shingles, bad weather, and tricky techniques. It’s not just about strength—it’s about knowing how to do it right.
I’ll show you three effective ways to install roof shingles. This guide is for anyone, whether you’re experienced or new to home improvement. You’ll learn how to move, handle, and put on shingles like a pro.
My detailed guide will make your roofing project a success. It will turn a possible mess into a great home improvement job.

Understanding Roof Shingle Basics and Materials
Choosing roof shingles is key for homeowners to protect and improve their homes. The right shingles boost your home’s strength, energy use, and looks. Let’s explore the basics to help you choose wisely.
When picking roof shingles, knowing the materials and their traits is vital. Each type affects your roof’s performance, life span, and cost.
Read also: Roof Shingles Colors Most Popular in 2024
Types of Roof Shingles Available
Exploring asphalt shingles reveals several main types:
- Asphalt Composition Shingles
- Most common and affordable option
- Available in multiple styles and colors
- Architectural Shingles
- Dimensional design with enhanced aesthetics
- Longer lifespan compared to standard options
- Metal Shingles
- Extremely durable
- Higher initial investment
- Slate Shingles
- Premium natural stone material
- Exceptional longevity
Read also: Composition Shingles vs Architectural Shingles
Essential Tools and Materials Needed
For roof shingle installation, you need specific tools and safety gear. Professional tools ensure correct application and avoid damage.
Cost Considerations for Different Shingle Types
Roof shingle cost changes with material quality and complexity. Here are some tips:
- Budget-friendly asphalt shingles: $100-$200 per square
- Mid-range architectural shingles: $250-$450 per square
- Premium materials like slate: $600-$1,500 per square
Knowing these options helps you invest wisely in your home’s roof. Think about your local climate, budget, and long-term needs when choosing shingles.
Safety Precautions and Preparation Before Installation
When you’re getting ready for a shingle roof installation, safety is key. Roofing safety tips are vital to keep you safe and ensure the job goes well. I’ll show you the important steps to take to stay safe and lay a strong base for your new roof.
Before you start climbing, make sure you have the right safety gear. Roofers say you need a full safety kit. This includes:
- Full-body safety harness
- Non-slip work boots
- Hard hat
- Safety glasses
- Work gloves
Getting your roof ready for shingles is more than just about safety. You should check your roof deck for damage or structural problems. Look for rotted wood, uneven spots, or water damage. Fixing these issues before you start helps avoid future problems and makes sure your roof is solid.
Choosing the right underlayment is also key for your roof’s health. Use top-notch synthetic underlayment for the best water resistance and protection. This step is essential for a strong barrier against moisture and leaks.
Good ventilation is important for your roof’s life. Make sure your attic has enough airflow to avoid heat and moisture buildup. Use ridge vents, soffit vents, or other systems to keep the temperature right and prevent shingles from deteriorating too soon.
Spending time on preparation can save you a lot of trouble and money later. Invest in your safety and the quality of your roof from the start.
How to Get Shingles on Roof: Transportation Methods
Getting shingles to your roof can be tough for DIY fans. The choice of method depends on your roof’s height, pitch, and how many bundles you need. Both pros and homeowners can safely move materials with the right plan.
Manual Bundle Carrying Techniques
When carrying shingles manually, safety is key. Here’s a simple guide:
- Use a sturdy ladder at the right angle
- Carry only one bundle at a time
- Wear slip-resistant work boots
- Use a roof hook or shoulder strap for balance
- Never carry bundles while climbing the ladder
Mechanical Lifting Solutions
For big projects, mechanical lifts can help. Homeowners can rent or buy different tools:
- Roofing material hoists
- Scaffolding lifts
- Powered wheelbarrows
- Telescoping material carriers
Professional Equipment Options
Pro crews use top-notch gear for moving materials. They use cranes, roofing trucks with elevators, and pneumatic conveyors. These tools quickly move bundles to the roof.
Choosing the right way to transport shingles makes your project safer and faster. Always put safety first and think about your project needs when picking a method.
Read also: How to Measure a Roof for Shingles
Valley Installation: Three Primary Methods

Understanding valley installation is key to protecting your home from water damage. Roof valleys are where two roof planes meet. They need special techniques for proper water drainage and durability.
Let’s explore the three main shingle installation tips for roof valleys:
- Woven Valley Method
- Closed-Cut Valley Technique
- Open Valley Installation
Each method has its own benefits, depending on your roof design and local weather. Choosing the right method can greatly affect your roof’s performance and lifespan.
Roofers pick a method based on several factors:
- Roof pitch and angle
- Shingle material type
- Local climate conditions
- Budget constraints
- Aesthetic preferences
Knowing these valley installation techniques helps you make better choices. Whether you’re doing it yourself or hiring pros, understanding shingle installation tips can save time and prevent water damage.
Read also: Temporary Fix for Leaking Roof
Woven Valley Installation Method
The woven valley method is a top choice for installing shingles. It makes the roof surface watertight and seamless. This method needs skill and precision, making it ideal for experienced roofers.
Woven valley installation works well with three-tab shingles. It gives your roof a smooth and uniform look. This protects your roof from water damage. Here are the key steps and things to consider for this method.
Step-by-Step Weaving Process
- Prepare the roof deck with a waterproof underlayment
- Align the first course of shingles along the valley centerline
- Cut shingles at a 45-degree angle to create a clean valley line
- Alternately weave shingles from each roof plane
- Ensure each shingle overlaps the previous one by at least 2 inches
Common Mistakes to Avoid
- Improper nail placement near valley edges
- Failing to maintain consistent overlap
- Using incompatible shingle types
- Skipping proper sealant application
Best Practices for Woven Valleys
To do a woven valley installation right, focus on alignment and overlap. Use roofing cement to seal each shingle. Always start from the bottom of the valley and work up. This way, you prevent water damage and extend your roof’s life.
Closed-Cut Valley Technique
The closed-cut valley technique is a precise way to manage roof valleys. It’s a professional method for installing asphalt shingles. This technique makes your roof look clean and streamlined.
This method gives a sharp, defined look. First, shingles from one roof plane are installed, reaching into the valley. Then, shingles from the other plane are cut back. This creates a straight line along the valley.
- Ideal for architectural shingles with thicker profiles
- Faster installation compared to woven valley methods
- Creates a more precise and clean valley appearance
- Provides excellent water drainage
From my experience, this technique has many benefits. It helps manage water better and prevents debris buildup. Roofers like it because it’s quick and keeps the roof looking great.
For a successful installation, you need to focus on overlap and precise cuts. Also, make sure to use enough water-resistant underlayment. Experts use special tools to get that clean line.
Open Valley Installation Process
Installing shingles with an open valley technique needs a lot of care. This method is great for managing water and keeping your roof strong.
The open valley method uses a metal channel between roof planes. It’s better at draining water than other methods. This makes it perfect for places with lots of rain.
Underlayment Requirements
Before putting in the metal valley, you need to use the right underlayment. I suggest a top-notch synthetic underlayment. It should:
- Be very water-resistant
- Have strong tear strength
- Protect against UV rays
- Cover the valley evenly
Proper Flashing Installation
Flashing is key to stopping water leaks. For open valleys, use metal flashing like galvanized steel or aluminum. Make sure the flashing:
- Reaches at least 8 inches on each side of the valley
- Is at least 26-gauge thick
- Is nailed down properly
- Has little overlap to avoid water trapping
Water Management Considerations
Open valleys are great at moving water away. The metal channel helps keep water from reaching important roof spots. It’s important to have the right slope and alignment for the best water management.
Essential Tips for Proper Shingle Alignment

Getting your shingles aligned right is key for a roof that looks good and keeps your home safe. When you’re doing DIY roof shingles, being precise is very important. Here are some top tips for installing shingles that can really help your project.
First, get ready with the right tools. Before you start, make sure you have:
- Chalk line
- Measuring tape
- Straight edge
- Roofing hammer
Here are some important tips for aligning shingles well:
- Use a chalk line to draw straight lines
- Keep the shingle exposure the same (5-6 inches)
- Make sure end joints are staggered to stop water leaks
- Check your work from different angles
When you’re working on DIY roof shingles, pay extra attention to valleys and edges. These spots need extra care to keep water flowing right and avoid leaks. Start at the roof’s bottom edge and move up, making sure each row overlaps the last one as needed.
Professional roofers say small mistakes can cause big problems. So, take your time, double-check your work, and don’t hurry. Aligning shingles right not only looks great but also protects your home better.
Weather Considerations During Installation
Getting your roof shingles installed right depends a lot on the weather. As a pro roofer, I’ve seen how temperature, humidity, and rain can affect your roof’s quality.
The best time to put on roof shingles is when it’s between 40°F and 85°F. If it’s too cold, shingles can crack. And if it’s too hot, they might get damaged or not seal right.
- Avoid installing shingles during rainy or extremely humid conditions
- Check weather forecasts before starting your roof shingle installation
- Protect materials from direct sunlight and moisture
Wind is also a big challenge. It can blow away materials, make it unsafe, and mess up where the shingles go. It’s best to wait for days when it’s calm and there’s little wind.
| Temperature Range | Installation Impact |
|---|---|
| Below 40°F | Shingles become brittle, risk of cracking |
| 40°F – 85°F | Optimal installation conditions |
| Above 85°F | Shingles may become too soft |
Professional roofers know that timing and getting ready for the weather are key. By watching the weather and taking the right steps, you can get a roof that lasts a long time.
Conclusion
Understanding how to get shingles on a roof is complex. It needs patience, preparation, and precision. Knowing about valley installations, material choices, and safety is key to success.
The roof installation is more than just covering your home. It’s about protecting your biggest investment. Choosing the right shingles, paying attention to details, and planning carefully can make a big difference. Whether you do it yourself or hire a pro, this knowledge will help you make better choices.
Start your roofing project with careful planning. Think about your climate, budget, and skills first. Remember, a well-installed roof lasts long and protects your home from the elements.
Spending time learning about roof installation is worth it. It keeps your home safe and looking good. Your hard work now can save you from expensive repairs later.


