Are you tired of constant roof repairs and high energy bills? Traditional roofing can be expensive and leave your home exposed to weather. Metal roofing is a strong solution, lasting long and saving on energy.
I’ll show you how to put metal roofing over plywood, step by step. This guide is for DIY experts and homeowners alike. It will help you upgrade your home’s roof.
By the end, you’ll know how to install metal roofing right. You’ll also learn to pick the best materials. Your new roof will be tough against bad weather and might even cut your energy costs.
Understanding Metal Roofing Basics
Metal roofing is a top choice for homeowners looking for durability and performance. I’ve worked with many roofing materials, and metal stands out for its long-lasting protection.
Understanding metal roofing starts with knowing the core materials and their unique traits. Manufacturers use several main materials for metal roofing:
- Aluminum – lightweight and resistant to corrosion
- Steel – strong and affordable
- Zinc – very durable
- Copper – has a premium look and lasts a long time
Benefits of Metal Roofing Systems
Metal roofing has many benefits that make it stand out. Its exposure durability classification shows its top performance:
- Can last up to 50 years with regular care
- Reflects sunlight, saving on energy costs
- Resists moss, mold, and other growth
- Helps keep cooling costs down by reflecting heat
Durability and Lifespan Expectations
My experience shows metal roofing is very durable. It can last 50 to 70 years, making it a great long-term investment. While it costs more to install than other materials, its long life and energy savings make it worth it for homeowners.
Essential Tools and Materials Needed
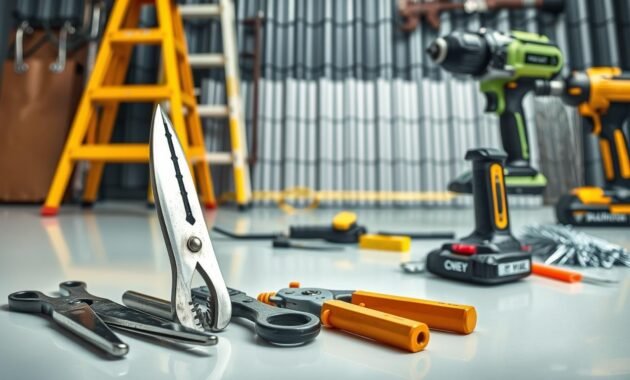
Getting ready for a metal roof installation needs careful planning and the right tools. I’ll show you the key tools, materials, and safety gear for a successful roofing job.

For professional metal roofing, you need a detailed toolkit. Sheffield Metals International suggests organizing your tools into groups. This makes your work more efficient and precise.
Required Tools for Installation
- Cutting Tools:
- Aviation snips (red for left cuts, green for right cuts)
- Double-cut shears
- Metal shears
- Measuring and Marking Tools:
- Speed squares (small and large)
- Tape measure
- Chalk line
- Fastening Tools:
- Torque-controlled screw guns
- Drill/driver
- High-compression caulking gun
Material Checklist and Quantities
When picking metal roof screws, choose the right sizes like #44 and #43 rivets. Make sure to focus on the roofing panel alignment. This ensures accurate placement and overlap. For most projects, aim for 12-inch panel overlaps to prevent leaks.
Safety Equipment Requirements
- Fall protection harness
- Non-slip work boots
- Safety glasses
- Work gloves
- Hard hat
Remember, the right tools and safety measures are key for a successful metal roof installation. Take your time to gather all the necessary equipment before you start.
Preparing Your Plywood Roof Deck
Starting your roof installation guide means first preparing your plywood roof deck. A solid foundation is key for a successful metal roofing project. Let’s go over the important steps to make sure your roof is reliable and durable.
Before you install metal roofing, inspect your plywood deck carefully. The American Plywood Association says to use plywood that’s at least 15/32 inches thick. Look for these signs during your check:
- Signs of water damage or rot
- Warped or buckled plywood boards
- Weak or soft spots in the deck
- Loose or protruding nails
Replace any damaged boards right away. A bad deck can cause structural problems and roof failure. Use high-quality OSB or marine-grade plywood for the best results. Clean the surface well, removing all debris and old roofing materials for a smooth base.
Read also: Metal Roof Flashing Types
Always put safety first. Wear non-slip shoes and a safety harness on the roof. Make sure all plywood boards are securely fastened and properly spaced. This careful prep work will help your metal roofing last up to 50 years with the right care.
How to Install Metal Roofing over Plywood
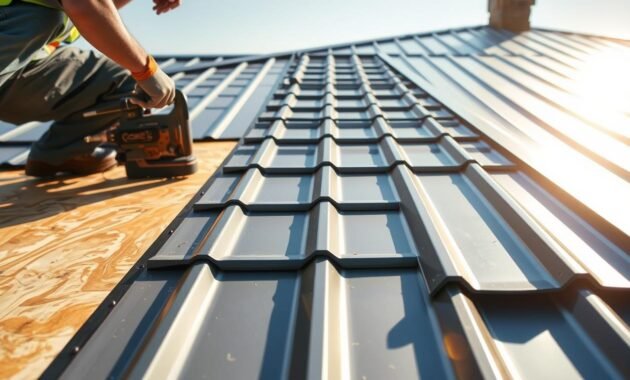
Installing metal roofing needs precision and planning. I’ll show you the key steps for a professional, watertight installation. This will protect your home for many years.

Before starting, prepare carefully. The American Plywood Association says use plywood that’s at least 15/32 inches thick. This is essential for a solid base for your metal roofing.
Measuring and Planning Layout
Getting accurate measurements is vital for a good metal roofing job. I advise taking precise roof measurements and making a detailed layout plan. Consider these important points:
- Measure the total roof area carefully
- Account for roof pitch and complexity
- Plan panel overlap (approximately 1 inch at the eave)
- Identify any obstacles like chimneys or vents
Installing Underlayment
Begin by installing a high-quality underlayment. I recommend synthetic or polymer-based materials for the best moisture protection. Use 1/2-inch roofing nails, spaced about every 6 inches, to secure it.
Securing Edge Trim and Flashing
Proper edge trim and flashing are key to stopping water leaks. When securing metal panels, fasten them every 12 to 16 inches. This ensures the best protection and follows industry standards.
Safety is very important during this work. Roofing falls cause 34% of construction deaths. If you’re not sure about your skills, consider hiring professionals.
Installing Waterproof Underlayment and Slip Sheets
Starting a waterproof roofing system means installing underlayment right. I’ll show you how to protect your roof’s base with building paper and special materials. These steps keep your home safe from moisture and weather.
Choosing the right underlayment for your metal roof is key. Here’s what I suggest:
- Go for top-notch building paper for moisture protection
- Make sure the plywood deck is fully covered
- Overlap sheets by at least 4 inches to block water
- Use half-inch roofing nails for a strong hold
Slip sheets are also essential for a waterproof roof. They keep the underlayment away from metal panels, allowing for movement. I advise using fire-retardant slip sheets that meet local codes.
Installing needs care. Metal panels should overlap roof edges by one inch. Each row should overlap the last by twelve inches. This method keeps water out and protects your plywood deck from moisture.
- Put slip sheets over the building paper
- Secure with galvanized metal screws
- Double-check for full coverage and smooth placement
By following these steps, you’ll build a strong waterproof roofing system. It will protect your home from water damage and make your metal roof last longer.
Proper Panel Installation Techniques
When you’re doing a DIY metal roofing project, knowing how to install panels is key. Getting the panels right is important for a roof that’s both watertight and strong.
I’ll show you the essential steps for a professional metal roofing job. Start at the roof’s bottom and go up. This method helps you place panels correctly.
Panel Alignment Methods
Getting panels aligned right involves a few important steps:
- Start at the roof’s lowest point
- Make sure panels overlap by at least one rib (12 inches is best)
- Use chalk lines for straight panel placement
- Check with a laser level for exact alignment
Fastening Guidelines
Fastening is vital for a successful DIY metal roofing job. Here’s what to do:
- Use metal roofing screws with neoprene washers
- Fasten every 12-16 inches along panel edges
- Make sure screws go into the roof deck at least 1 inch
- Avoid tightening too much to avoid panel damage
Seam Sealing Procedures
Keeping water out is essential in metal roofing. Seam sealing creates a tight barrier against moisture. Use special sealants on panel edges and overlaps for the best protection.
By using these techniques for panel alignment and installation, you’ll get a strong, lasting metal roof. It will stand up to harsh weather and keep your home safe.
Installing Ridge Caps and Ventilation
Finishing your metal roof needs focus on ridge caps and ventilation. As a seasoned roofer, I’ll show you the key steps to keep your roof safe and working well.
Ridge caps seal the roof’s peak and stop water leaks. Roofers suggest using caps that fit your metal roof’s design. They usually come in lengths from 10 to 12 feet, with sizes like 7″x7″ and 10″x10″.
Ridge Cap Installation Steps
- Ensure a 6-inch overlap between ridge cap sections
- Leave a 2-inch gap between metal roofing sheets at the peak
- Use metal-to-metal fasteners at 12-inch intervals
- Apply silicone sealant 2 inches from the inside overlap
Ventilation is key to avoid condensation and keep your roof lasting longer. Pipe boot kits are essential for sealing vent pipes. Make sure they’re placed right and sealed well.
Read also: Replacing Shingle Roof with Metal Roof
Ventilation Considerations
- Create a 2-inch wide opening at the ridge for proper airflow
- Use foam closure strips for non-vented ridge caps
- Position ProfileVent ½” to 1″ up-slope from the ridge cap edge
While DIY fans can try this, complex systems might need a pro. The complexity and long-term effects make getting expert advice wise.
| Ridge Cap Component | Specification |
|---|---|
| Average Cost | $2.00 – $3.50 per linear foot |
| Recommended Overlap | 6 inches |
| Fastening Interval | 12 inches on center |
Weather Protection Considerations
Keeping your metal roof safe from harsh weather is key to a lasting waterproof roof. Different areas face unique challenges. So, it’s important to use the right metal roofing tips for the best results.
In places with lots of snow, extra protection is a must. Metal roofs need special care to avoid damage and keep homeowners safe.
Snow Guard Installation Strategies
Snow guards are vital for stopping snow slides on metal roofs. They spread out snow and ice, lowering the chance of damage or harm.
- Install snow guards strategically along roof edges
- Space guards evenly to prevent uneven snow distribution
- Choose guards compatible with your specific metal roofing material
- Consider professional installation for optimal performance
Read also: How to Prevent Snow from Sliding Off Metal Roof
Ice Dam Prevention Techniques
Stopping ice dams needs a full plan for your metal roof. Good insulation and ventilation are essential to avoid ice and water damage.
- Ensure adequate attic insulation to prevent heat loss
- Maintain proper roof ventilation
- Install heated cable systems in problematic areas
- Use high-quality underlayment to create a moisture barrier
Using these weather protection tips can make your metal roof last longer. It also keeps your home safe from weather damage. Proper installation and care mean long-term peace of mind.
Conclusion
Exploring metal roof installation over plywood reveals its long-term benefits. It can last up to 50 years, outshining asphalt shingles. This makes it a wise choice for your home.
The installation process needs care and precision. Choosing the right plywood and spacing fasteners correctly is key. Each step ensures a strong roof. If you’re unsure, always ask for professional help.
Keeping your metal roof in good shape is essential. Regular checks and quick fixes can prevent damage. This way, your roof will protect your home, save energy, and look great.
Finishing your roofing project is a big achievement. A well-done metal roof is more than a roof. It’s a lasting investment in your home’s safety and value.


