Dealing with a leaky roof can be frustrating and costly. Water damage threatens your property’s structural integrity, causing mold growth and expensive repairs. Rolled roofing materials often suffer from wear and tear, leaving homeowners stressed about roof replacement.
Fortunately, repairing rolled roofing doesn’t have to be a nightmare. My guide will show you how to repair rolled roofing effectively, saving you money and protecting your property. With the right materials and techniques, you can tackle most repairs confidently and professionally.
I’ll walk you through everything from understanding rolled roofing tips to executing precise repair strategies. Whether you’re dealing with a shed, gazebo, or low-slope roof, this guide will equip you with the knowledge to restore your roof’s integrity.
Read also : What is Roll Roofing
Understanding Rolled Roofing Materials and Their Common Issues
As a homeowner, knowing about roofing materials is key to keeping your roof in good shape. Rolled roofing is a cost-effective and practical choice for flat roofs. It’s great for places like sheds, garages, and mobile homes.
Types of Rolled Roofing Available
I’ve worked with many types of rolled roofing. Each has its own special features:
- Asphalt Roll Roofing: Most common, made from saturated felt with waterproofing coating
- Fiberglass Roll Roofing: Lighter and more durable with fiberglass matting
- Peel-and-Stick Roll Roofing: Features adhesive backing for easy installation
- Modified Bitumen: Emerged in the 1960s as an alternative roofing system
- TPO (Thermoplastic Polyolefin): Popular for commercial applications
- PVC (Polyvinyl Chloride): Resistant to grease and chemicals
Common Problems with Rolled Roofing
During roof damage inspections, I’ve seen a few common issues with rolled roofing:
- Blistering and bubbling
- Seam separation
- Water leaks
- UV and weather damage
- Punctures and tears
When to Repair vs. Replace
Roll roofing usually lasts 5 to 10 years. Small damages can often be fixed, but big problems might need a new roof. You should replace it if:
- More than 50% of the roof is damaged
- Leaks keep happening
- The roof is almost at the end of its life
- Fixing it would cost almost as much as a new roof
Getting a professional’s opinion can help find the best solution for your roof.
Essential Tools and Materials for Roof Repair
When you’re fixing a rolled roofing, the right tools are key. I’ll show you what you need to fix your roof right.

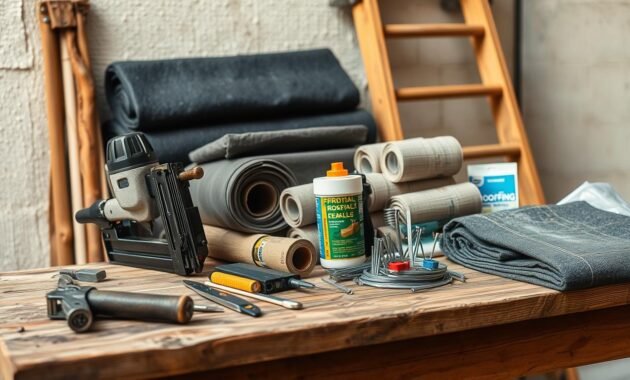
Here’s a list of tools you can’t do without for fixing rolled roofing:
- Utility knife (heavy-duty roofing knife recommended)
- Hand roller and large push roller (80-100 lbs)
- Exterior grade caulk and caulking gun
- Protective work gloves
- Low-VOC spray adhesive
- Roof cement
- Roofing patches
Quality tools are a must for a top-notch repair. The right tools make your job easier and last longer. A roofing nail gun can make your work much faster, up to ten times faster than a hammer.
When picking materials, think about what rolled roofing needs. Black mineral-surfaced roll (MSR) is the most common. It works best when it’s warm, above 50°F. Rolled roofing is good for low-pitch roofs like patios, sheds, and garages.
Pro tip: Always have extra materials ready. Experts say to have about 10% extra for cuts and mistakes.
Safety Precautions Before Starting Roof Repairs
When you start a DIY roof repair, safety comes first. Roof repairs can be risky, with 25% of accidents happening because of bad equipment or no safety steps. I’ll show you important safety steps to keep you safe while fixing your roof.
Before you start, know the risks. 40% of DIY roof repairs cause more damage or hurt someone. This shows how key it is to prepare well and plan for safety.
Weather Considerations
Choosing the right weather is key for safe roof repairs. Here are some weather tips:
- Work only when it’s dry and mild
- Stay away from repairs in rain, snow, or strong winds
- Best temperature: Above 55°F
- Check the weather forecast before starting
Personal Protective Equipment
Wearing the right safety gear is a must for DIY roof repairs. 90% of roofing pros say protective gear is vital. Your safety kit should have:
- Non-slip, sturdy work boots
- Safety harness
- Hard hat
- Safety glasses
- Work gloves
Roof Safety Guidelines
When you’re on the roof, follow these safety tips:
- Use a strong, well-set ladder
- Always have three points of contact
- Work with a partner for help in emergencies
- Keep your work area tidy and organized
- Use tool restraints to avoid dropping things
While DIY roof repairs can save money, your safety is most important. If you’re unsure or the damage is big, it’s best to call a professional roofer.
How to Repair Rolled Roofing: Step-by-Step Process

Repairing rolled roofing can save you time and money. I’ll guide you through the key steps. This will help you fix your roof effectively and ensure it lasts.
Before you start, make sure you have these materials:
- Roofing cement
- Utility knife
- Roofing patches
- Cleaning cloth
- Protective gloves
The repair process needs careful attention. First, clean the damaged area well. Remove any debris or loose materials. Then, check the roof for cracks, tears, or weak spots that need fixing.
- Clean the damaged section completely
- Cut a roofing patch slightly larger than the damaged area
- Apply roofing cement generously around the damaged section
- Place the patch carefully over the cement
- Press firmly to ensure complete adhesion
Pro tip: Use 1/8 to 1/4 inch of roofing cement for the best adhesion. This thickness creates a waterproof seal that protects your roof from water damage.
Remember, rolled roofing lasts 5 to 15 years. Regular maintenance is key. By following these steps, you can make your roof last longer and avoid expensive repairs later.
Read also: What Is Elastomeric Roof Coating
Surface Preparation and Cleaning Techniques
Getting the roof ready for repair is key. Before you start, it’s important to make the surface clean and smooth. This step is vital for a lasting fix.
Effective cleaning is about more than just wiping down the roof. It’s about making sure everything sticks well. Here are the top cleaning methods I suggest:
- Remove all loose debris using a stiff-bristled brush
- Clean the surface with a specialized roof cleaning solution
- Use a pressure washer on low settings to eliminate stubborn dirt
- Allow the surface to dry completely before starting repairs
Addressing Surface Irregularities
Irregularities can ruin the repair. I always check the roof for any issues:
| Surface Issue | Repair Technique |
|---|---|
| Small bumps | Sand down carefully with roofing sandpaper |
| Depressions | Fill with roofing cement or leveling compound |
| Cracked areas | Clean thoroughly and apply reinforcement patch |
The National Roofing Contractors Association says to check roofs twice a year. This helps find and fix problems early. Remember, cleaning well is essential – bad cleaning can ruin the repair.
- Ensure the surface is completely dry
- Remove all oil, grease, and debris
- Use appropriate primers if needed
By using these cleaning steps, you’ll set up your roof for a successful repair. This will keep your roof safe for many years.
Applying Roofing Cement and Patches
Fixing your roof is key to keeping your home safe. I’ll show you how to use roof cement right. This ensures your roof is fixed well.
Picking the right roof cement is the first step. Not all cements are good for every fix. Here’s what to think about when choosing and using roof cement:
- Make sure the cement fits your roof material
- It should be made for outside use and stand up to the weather
- Choose one that’s flexible and lasts a long time
Before you start, clean the damaged spot well. This is important because roof leaks can really harm your home. For small issues, regular cement is fine. But for bigger problems, you might need more stuff like rolled roofing or fiberglass patches.
How you apply the cement is very important. Use a trowel or putty knife to spread it evenly. Try to get a layer that’s about a quarter to half-inch thick around the damage. Work slowly to cover everything well and make it smooth.
Staying safe is always first when fixing your roof. Wear protective gear and fix it when it’s dry. Remember, roof cement is just a quick fix. For big problems, you should get a pro’s opinion.
- Put cement on in layers, letting each dry fully
- Keep cement in a cool place overnight if it’s cold
- Don’t apply it near open flames because it can catch fire
By using these tips, you can fix small roof problems. This helps keep your home safe from water damage.
Sealing and Waterproofing Techniques
Keeping your rolled roofing dry is essential. I’ll show you the best ways to seal and waterproof it. This will make sure your roof stays strong and leak-free.
Proper Sealing Methods
Fixing leaks in rolled roofing needs precision. I suggest using MFM Low-VOC Spray Adhesive for strong adhesion. This is important around:
- Perimeter edges
- Flashing areas
- Vertical surfaces
- Repair zones
Waterproof Coating Application
Using a waterproof roof coating can make your roof last longer. Here’s how to do it:
- Clean the surface well
- Check for any damage
- Put on a 1/2-inch layer of sealant
- Embed fiberglass mesh in the first layer
- Wait 12 hours for it to dry
- Apply a second layer of sealant
- Finish with a reflective coating
Good waterproofing stops leaks and saves your roof. With the right care, your roof will last longer and work better.
Dealing with Seams and Overlaps
Seams and overlaps are key areas to watch in rolled roofing. They are often where leaks and damage start. I’ve learned that these spots need extra care.
In my guide, I’ll share important tips for fixing seams. The right overlap is essential:
- Side laps should be 3 inches wide
- End laps must extend 6 inches
- Lap lines are initially marked but will fade over time
For fixing seams, I suggest using special roofing cement. Apply it about 6 inches wide for strong protection. A thin layer that hides the fabric weave is best for keeping water out.
Here are some tips for keeping seams in good shape:
- Check seams every year after bad weather
- Watch for cracks or separations
- Use extra fabric in stress areas
- Plan for repairs every 2-3 years
Experts say seams on roofs with a 1/12 pitch are more likely to leak. By following these steps, you can make your rolled roofing last longer and avoid expensive water damage.
Conclusion
Starting your rolled roofing repair journey? Affordable fixes are possible. I’ve given you detailed tips to handle minor repairs with confidence. DIY roof repair can save you a lot of money and keep your home safe.
Regular maintenance is essential for a long-lasting roof. Rolled roofing can last 10-20 years with the right care. The methods we’ve talked about will help you fix small issues before they cost a lot. Always remember to stay safe and call a pro for big repairs.
Learning to fix your roof is more than saving money. It makes you a proactive homeowner. Every repair you do makes you more confident and keeps your home safe from water damage. Keep your tools ready, stay alert, and tackle each problem with care.
With this guide, you’ll get good at maintaining your rolled roofing. Your roof is your home’s first defense. With the right knowledge, you can keep it in great shape for years.


