Water damage can quietly harm your home’s structure, leading to costly repairs. Many homeowners don’t realize how important metal roof chimney flashing is. Without it, chimneys can leak, causing serious moisture problems.
Chimney flashing is key in keeping water out. Without it, your home could face damage, mold, and even higher energy bills. Learning about chimney flashing can help protect your home from water damage.
It’s wise to hire professionals for chimney flashing installation. This step can prevent water damage, extend your chimney’s life, and keep your home safe. The benefits are well worth the cost.
Read also: How No Pressure Roof Cleaning Works
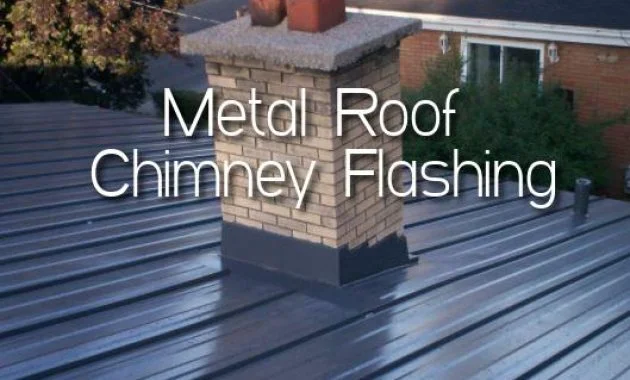
Understanding Chimney Flashing and Its Critical Role
Keeping your metal roof safe from water damage is key. Knowing about chimney flashing is important. It helps keep your home strong.
Chimney flashing acts as a shield between your roof and chimney. It stops water from getting in and causing damage. The right flashing can save you from costly repairs.
Components of a Complete Flashing System
A good chimney flashing system has a few main parts:
- Base flashing: Creates the main water seal
- Counter-flashing: Adds extra protection against water
- Step flashing: Keeps water away from roof corners
- Kickout flashing: Sends water away from roof and wall
How Flashing Protects Your Home
Water damage can harm your home’s structure a lot. Metal roof chimney flashings stop moisture from getting in. They protect against:
- Wood rot
- Mold and mildew
- Damage to ceilings and walls
- Roof damage
Impact on Energy Efficiency
Flashing does more than just stop water damage. It also helps keep your home warm by sealing it tight. This stops drafts and saves energy.
| Flashing Material | Durability | Weather Resistance |
|---|---|---|
| Aluminum | 15-20 years | Excellent |
| Galvanized Steel | 10-15 years | Good |
| Copper | 30-50 years | Superior |
Choosing quality chimney flashing is a smart move. It protects your home from water damage and keeps it strong for years.
Types of Metal Roof Chimney Flashing Materials
Choosing the right material for your metal roof chimney is key. Different metals have their own benefits. These can affect how well your roof lasts and performs.
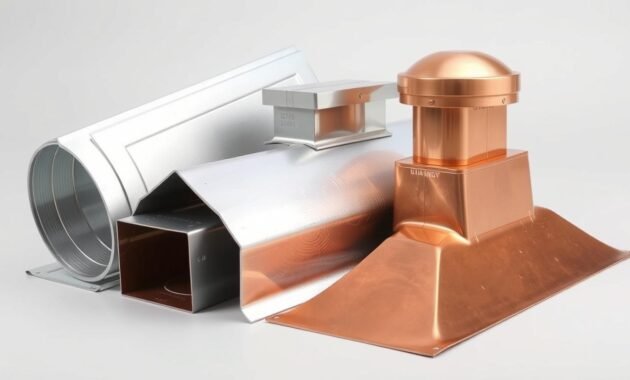
Let’s look at the most common materials for metal roof chimney flashing:
- Aluminum Flashing
- Lightweight and cost-effective
- Corrosion-resistant
- Easy to install
- Copper Flashing
- Very durable
- Lasts for decades
- Looks great
- Galvanized Steel Flashing
- Strong and sturdy
- Affordable
- Good for homes and businesses
Material choice depends on several things. Aluminum is popular for its low cost. Copper is known for its long life. Galvanized steel is a good middle ground for many.
Think about your local weather and budget when picking flashing. A roofing expert can guide you to the best choice for your metal roof chimney.
Essential Benefits of Professional Metal Roof Chimney Flashing Installation
Getting professional roof chimney flashing can save you a lot of time, money, and stress. It offers vital protection for your home’s most vulnerable spots.
Here are the main benefits of getting your chimney flashing installed by the pros:
Prevention of Water Damage
Water damage can be really bad for homeowners. Professional roof chimney flashing can stop costly repairs that can cost between $1,000 and $4,000. Without it, homes are 60% more likely to leak, leading to:
- Structural wood rot
- Mold and mildew growth
- Ceiling and wall damage
- Foundation deterioration
Extended Chimney Lifespan
Proper chimney pipe flashing can make your chimney last up to 20 years longer. This means you’ll need fewer replacements and spend less on maintenance over time.
Cost-Effective Long-term Solution
Investing in professional installation can save you a lot. Here are some key points to consider:
| Installation Type | Leak Prevention Rate | Potential Cost Savings |
|---|---|---|
| Professional Installation | 90% | Up to $3,000 per incident |
| DIY Installation | 30% | Potential additional repair costs |
Remember, professional chimney flashing installation is a smart investment in your home’s health and efficiency. It prevents water damage and boosts energy performance, saving you money and protecting your property.
Step-by-Step Metal Roof Chimney Flashing Installation Process
Installing chimney flashing on a metal roof needs precision and planning. As a roofing expert, I’ve found that each step is key. It helps create a tight seal that keeps your home safe from water damage.
The steps for installing flashing on a metal roof are important:
- Prepare the Chimney Surface
- Clean the area well
- Remove any old, damaged flashing
- Check if the chimney is strong
- Install Base Flashing
- Put down waterproof underlayment
- Place base flashing at the chimney’s bottom
- Make sure it overlaps the roof right
- Apply Step Flashing
- Cut metal pieces to fit the roof’s slope
- Make each piece overlap the next by at least 2 inches
- Secure with roofing nails
- Add Counter Flashing
- Put a protective layer over the step flashing
- Seal the edges with good caulk
- Make sure it’s fully water-resistant
Getting a pro to install flashing can really help avoid water damage. Studies show that right flashing can stop leaks in about 90% of places where water might get in. This helps keep your home’s structure safe.
While some might try to do it themselves, I suggest getting a pro. Wrong installation can cost over $5,000 to fix. So, getting an expert is a smart choice.
Common Problems with Inadequate Flashing Systems
Metal roof chimney flashing is key to keeping your home dry. Yet, many homeowners ignore signs of trouble. This can lead to costly fixes.
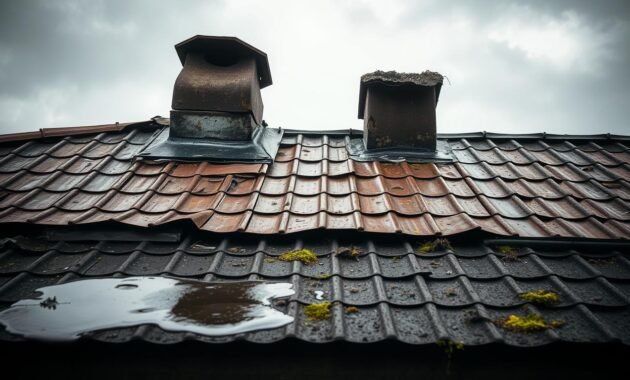
Chimney flashing failure can cause big problems. Knowing these issues helps you fix them before they get worse.
Signs of Flashing Failure
Spotting early signs of chimney flashing trouble is important. Look out for these signs:
- Water stains on interior walls or ceilings
- Visible rust or corrosion on flashing materials
- Gaps between the chimney and flashing
- Peeling paint near the chimney area
Water Infiltration Issues
Water leaks are a big problem with metal roof chimney flashing. If it’s not installed right or starts to wear out, water can get in. This can harm your home’s structure.
| Problem | Potential Consequences |
|---|---|
| Rust and Corrosion | Weakened flashing material |
| Temperature Fluctuations | Cracking and separation |
| Material Degradation | Reduced water resistance |
Structural Complications
Ignoring chimney flashing problems can cause serious damage. Water can rot wood, grow mold, and harm your home’s foundation. Getting regular checks from experts can save you money.
Keeping your metal roof chimney flashing in good shape is the best way to avoid water damage and expensive fixes.
Read also: Metal Roof Flashing Types
Maintaining Your Metal Roof Chimney Flashing
Keeping your metal roof chimney flashing in good shape is key. Regular care can save you money and make your roof last longer. Here are some important tips to help you maintain your flashing.
It’s important to check your flashing often. Here are some steps you should take:
- Do a yearly check-up on your roof chimney flashing
- Clear away debris and leaves from around the flashing
- Look for rust, corrosion, or any damage
- Use the right materials to seal small gaps
- Trim tree branches that could harm the flashing
Knowing the signs of trouble can save you a lot of money. Water stains on ceilings or walls mean you might have a flashing issue. If you see rust or corrosion, you need to act fast.
| Maintenance Action | Frequency | Potential Cost Savings |
|---|---|---|
| Professional Inspection | Annually | Up to $1,000 in repair costs |
| Debris Removal | Twice a Year | Prevents water damage |
| Sealant Check | Every 2-3 Years | Reduces energy loss by 30% |
While you can do some maintenance yourself, getting a pro to check your flashing is best. They can spot problems you might miss. Getting regular professional checks can make your flashing last 20-30 years.
Preventing problems is cheaper than fixing them. Spending a few hours each year on maintenance can keep your home safe and save you money.
Weather Resistance and Durability Factors
Protecting your home is important. Knowing how well chimney pipe and pipe flashing handle the weather is key. Different materials work better in different climates, so choosing the right one is vital.
Metal roof chimney flashing faces many environmental challenges. The right material can keep your home safe from water damage.
Performance in Different Climate Conditions
The climate affects which flashing material is best. Here are some important points:
- Coastal areas need materials that resist corrosion, like aluminum or stainless steel
- Places with lots of rain should use durable materials, such as copper or galvanized steel
- Areas with big temperature swings need materials that are flexible and strong
Material Longevity Considerations
I’ve looked into how long different chimney pipe flashing materials last. This helps homeowners make better choices:
| Material | Average Lifespan | Climate Suitability |
|---|---|---|
| Copper | 80-100 years | Excellent for harsh environments |
| Aluminum | 20-30 years | Good for moderate climates |
| Galvanized Steel | 30-50 years | Versatile performance |
Regular inspections are essential to keep your chimney flashing in good shape. I suggest checking it every year, and after big weather events. This helps find problems early and avoids expensive fixes.
Conclusion
Investing in quality metal roof chimney flashing is more than just a home improvement project. It’s a critical defense mechanism for your property. The data shows that proper roof chimney flashing can prevent water damage. This damage could cost homeowners thousands of dollars in repairs.
Understanding the protection offered by professional chimney flashing installation can save you money. Services like Teflon Roofing can reduce leaks by up to 80%. Routine maintenance can cut major repair risks by 50%. High-quality flashing materials can also extend your roof and chimney’s lifespan by 20-30% in tough weather.
My recommendation is clear: prioritize your metal roof chimney’s protection. Regular inspections and durable materials like copper or galvanized steel are key. Working with skilled professionals can turn your roof into a strong shield against environmental challenges. Your home deserves nothing less than complete, strategic protection.
By making informed choices about roof chimney flashing, you’re not just maintaining a structure. You’re preserving your most significant investment. Smart homeowners know that prevention is always more cost-effective than extensive repairs.


