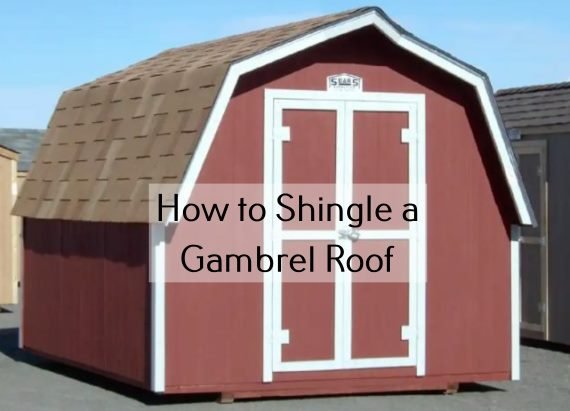
Shingling a gambrel roof can be tough. Its unique two-slope design makes it hard. Leaky roofs, uneven coverage, and water damage can ruin your project.
I’ve created a detailed guide to shingle a gambrel roof easily. It’s perfect for DIY fans or those who want to learn from pros. This article will help you tackle your gambrel roof project with confidence.
Ready to make your roof installation a success? Our step-by-step guide will show you how to shingle a gambrel roof.
Read also: How to Remove Moss from Roof with Detergent
Understanding Gambrel Roof Structure and Design

I love working with gambrel roofs. They mix function with classic beauty. This makes them a favorite for homeowners who want both looks and practicality.
The gambrel roof is known for its two-slope design. This design gives more attic space than regular roofs. Knowing its special features is key for shingling it right.
Read also: How to Install Drip Edge on Shed Roof
Unique Features of a Gambrel Roof
- Two distinct slope angles on each side of the roof
- Lower slope with a steeper pitch
- Upper slope with a gentler angle
- Maximizes interior living space
- Classic barn-style appearance
Importance of Proper Shingle Installation
Installing a gambrel roof needs careful attention. The area where slopes meet is tricky. Wrong installation can cause leaks, damage, and shortens the roof’s life.
Common Challenges with Gambrel Roofing
Roofing a gambrel roof comes with its own set of challenges. The different slopes need precise shingle placement and waterproofing at the meeting points. Tips I’ve learned stress the need for the right materials and methods for a tight seal.
Getting a gambrel roof right takes patience, skill, and knowing its unique structure. Mastering these techniques will give you a roof that’s not just beautiful but also durable.
Essential Tools and Materials Needed for Roof Shingling
Getting ready for a gambrel roof shingling project means picking the right tools and materials. I’ll show you the key equipment and supplies for a successful roofing job.

- Safety harness and fall protection equipment
- Hammer or pneumatic nail gun
- Utility knife with extra blades
- Roofing underlayment
- Measuring tape
- Chalk line
- Ladder stabilizer
Read also: Peel and Stick Roof Underlayment
Choose quality asphalt shingles for your gambrel roof. They should handle your local weather well. The right shingles mean your roof lasts longer.
| Material | Recommended Type | Best Use |
|---|---|---|
| Shingles | Architectural/Dimensional | Complex roof designs |
| Nails | Galvanized Roofing Nails | Rust-resistant attachment |
| Underlayment | Synthetic Roofing Felt | Water barrier protection |
Investing in good tools and materials saves time and money later. Always focus on safety and accuracy during your project.
Safety Precautions and Preparation Tips
Roofing projects need careful planning and strict safety rules. As a DIY roofing guide expert, I’ve learned that keeping yourself safe is as important as the project. Safety is not optional—it’s a must for any roof installation to succeed.

Before you start on your gambrel roof, you must prepare well. Roofing safety tips begin with knowing the risks and having the right gear and knowledge.
Installing Safety Harnesses
A good safety harness is your first defense against falls. When picking a harness, look for these key things:
- Weight capacity that matches your body weight
- Compatibility with your roof’s pitch
- Quality certifications from trusted safety groups
- Adjustable straps for a snug, comfortable fit
Weather Considerations
Choosing the right time for roof installation is key. I suggest picking a day with:
- Temperature between 40-85 degrees Fahrenheit
- Clear skies and no rain
- Low wind
- Moderate humidity
Setting Up Your Workspace
A tidy workspace prevents accidents and boosts efficiency. Make sure you have:
- A non-slip ladder placed securely
- A clean, clear roof surface
- All tools within easy reach
- A helper or spotter on the ground
No roofing project is worth risking your safety. Take your time, stay focused, and always put safety first.
How to Calculate Shingle Requirements

When planning a roof maintenance guide for your gambrel roof, accurately calculating shingle requirements is key. I’ll show you a step-by-step process to get the right amount of materials for your project.
To start your roof maintenance guide calculation, you’ll need a few essential tools:
- Measuring tape
- Calculator
- Ladder
- Notepad
Measuring your roof involves several key steps:
- Measure the length and width of each roof slope
- Calculate the square footage of each section individually
- Add all section measurements together
- Add a 5% buffer for possible waste
Here’s a helpful calculation guide to determine your shingle needs:
| Roof Section | Length (ft) | Width (ft) | Square Footage |
|---|---|---|---|
| Lower Slope | 20 | 10 | 200 |
| Upper Slope | 15 | 8 | 120 |
| Total Calculated Area | 320 sq ft | ||
| 5% Waste Buffer | 16 sq ft | ||
| Total Shingle Requirement | 336 sq ft | ||
Pro tip for your roof maintenance guide: Always buy a bit more shingles than you need. This prevents delays and gives you extras for repairs or mistakes.
How to Shingle a Gambrel Roof
Shingling a gambrel roof needs precision and careful detail. I’ll guide you through the key steps for a professional, watertight job. The gambrel roof’s unique design requires special techniques for proper coverage and protection.
Starting at the Bottom Edge
The foundation is key when shingling a gambrel roof. Start at the bottom corner of the lower roof section. Use high-quality 3-tab shingles for the best results. Here’s a step-by-step guide:
- Select galvanized roofing nails for maximum durability
- Position the first shingle flush with the roof’s edge
- Ensure the shingle is level and straight
Read also: How Many Roofing Nails per Square for Shingles
Proper Nailing Techniques
Secure your shingles with precision. Use four nails per shingle, spaced evenly across the top third. The right nailing technique prevents wind damage and ensures long-lasting roof protection.
Creating Stagger Patterns
Staggering is key in roof shingle steps. Finish the first bottom row, then start the next row by offsetting the tab gaps. This method creates a water-resistant barrier and enhances the roof’s look.
- Overlap each row by approximately 5 inches
- Alternate the starting point of each row
- Check alignment frequently to maintain straight lines
By following these techniques, you’ll get a professional-looking gambrel roof. It will protect your home from the elements while keeping its structure strong.
Mastering the Transition Area Installation
Shingling a gambrel roof needs careful attention to the transition area. This area is key to a successful roof installation. I’ll share the essential techniques for a watertight and professional finish.
The transition area is tricky during gambrel roof installation. It’s important to place shingles right to avoid water leaks and keep the roof strong. You must focus on how shingles overlap and seal in this area.
- Carefully align the bottom edge of shingles at the transition point
- Ensure complete coverage of the roof’s changing angle
- Use roofing cement for additional water protection
- Create a smooth, consistent overlap between shingle rows
For shingling the gambrel roof transition, start by placing shingles slightly over the edge. Nail the upper edge firmly, ensuring each row overlaps the last. Bend the shingles to fit the roof’s shape, creating a solid barrier.
Pro tip for gambrel roof installation: Apply roofing adhesive to the transition area. It adds extra protection against water leaks. This small step can greatly enhance your roof’s life and performance.
Advanced Techniques for Proper Shingle Alignment
Getting shingles to line up perfectly can make a big difference in how your roof looks. Over the years, I’ve learned that it takes precision and attention to detail to master the shingle overlap technique.
Understanding where your roof’s connection points are is key to proper shingle alignment. I’ll share some advanced methods to help you achieve a watertight and attractive roof.
Managing Overlap Techniques
The secret to great shingle installation is a consistent overlap. Here are my best tips:
- Keep the overlap between shingle rows at 5-6 inches
- Stagger the end joints to stop water from getting in
- Use a chalk line for straight alignment
Securing Bent Tabs
Fixing bent or damaged shingle tabs needs care. I suggest using roofing adhesive for these tricky spots. Just apply a small amount of adhesive under the tab and press it firmly.
Adhesive Application Methods
Roofing adhesive is essential for a solid seal. Here’s how I do it:
- Clean the area well before applying adhesive
- Use a roofing caulk gun for precise application
- Apply a thin, even bead of adhesive
- Press shingles firmly for maximum contact
The aim is to create a seamless barrier against water. By mastering these advanced techniques, you’ll get a durable and professional-looking roof that can handle any weather.
Installing Ridge Cap Shingles
After finishing the main shingle coverage on your gambrel roof, the last step is installing ridge cap shingles. These shingles protect the roof’s peak and give your roof a polished look.
Ridge cap shingles are key to stopping water from getting in and protecting the roof’s most exposed area. Here’s how to install them like a pro:
- Clean the ridge line well before you start
- Make sure all shingles underneath are securely in place
- Place ridge cap shingles right along the roof peak
- Use roofing nails made for ridge caps
When putting on ridge cap shingles, it’s important to get the overlap right. Each shingle should slightly cover the one before it, making a solid water barrier. Start at the bottom of the ridge and go up, making sure each shingle is well fastened.
| Ridge Cap Shingle Installation Tips | Best Practices |
|---|---|
| Nail Placement | 2 nails per shingle, 1 inch from each edge |
| Overlap Length | Minimum 2-3 inches between shingles |
| Nail Depth | Flush with shingle surface, not overdriven |
By sticking to these tips, you’ll finish your gambrel roof with a professional finish. This protects against water damage and makes your home look better.
Conclusion
Learning to shingle a gambrel roof requires patience and skill. I’ve shown you each important step of this challenging project. You now have a detailed guide to help you succeed.
For a durable and professional-looking roof, follow key gambrel roof tips. Always prioritize safety. Preparing your workspace and tools well can greatly improve the result. Remember, proper technique is more important than speed on such a unique roof.
Your gambrel roof will protect your home for many years if you follow our advice. Careful installation and attention to detail are essential. Take your time and double-check each step.
With practice and persistence, you’ll master this roofing project. Whether you’re a DIY fan or a professional, these techniques will help you achieve a top-notch finish on any gambrel roof.


