Do you have leaky or unstable metal roofing? Many homeowners struggle with installing metal roofs. This can harm your roof’s strength and performance.
Improper screw placement can cause water damage and reduce your roof’s life. It can also lead to costly repairs.
Understanding how to place screws correctly is key. Metal roofs need about 80 screws per square. Learning the right pattern ensures a tight seal and a long-lasting roof.
This guide will show you how to improve your metal roofing installation. You’ll learn strategies to make your roof watertight and durable.
Understanding Metal Roofing Basics and Benefits
Metal roofing has changed the construction world with its lasting durability and performance. As a roofer, I’ve seen how metal roofs improve a building’s look and protection. These roofs stand out because of their strong benefits.
Let’s explore the main points of metal roofing. It’s a top choice for many because of its benefits.
Types of Metal Roofing Systems
Metal roofing has many types, each for different needs:
- Standing Seam Panels: Great for solid wood structures
- Corrugated Panels: Best for metal purlins
- Metal Roof Tiles: Looks good and is versatile
- Curved and Architectural Panels: For custom designs
Advantages of Metal Roofing Installation
Metal roofing has many great points. It lasts over 50 years, beating asphalt shingles. Homeowners gain a lot:
- It’s very durable
- Helps save energy
- Is fire-resistant
- Needs little upkeep
- Uses eco-friendly materials
Essential Tools and Materials
Installing metal roofs needs the right tools and materials. The right roof screw is key for attaching panels. You’ll need:
- Power drill
- Special metal roof screws
- Measuring tape
- Safety gear
- Sealants and protective coatings
Knowing these basics helps you choose wisely for your roof. The right steps lead to a strong, efficient roof that lasts a long time.
Metal Roof Screw Pattern and Placement Guidelines

Installing a metal roof right is key for its long life and good performance. The screw pattern changes based on the metal roofing type. This includes standing seam and corrugated panels.
Important things to think about for metal roof screws are:
- Panel type and width
- Wind load needs
- Substrate material
- Local building codes
For ⅞” corrugated panels, use four screws at the panel’s high point. Standing seam roofs need screws hidden under the seams. This makes the roof look better and keeps it weather-tight.
Read also: Screw Pattern for Metal Roofing: Why Is It Important?
How far apart screws are placed matters a lot. Here’s what’s recommended:
- Put screws 12 to 18 inches apart on ribs.
- Don’t go more than 24 inches apart in flat spots.
- Add more screws in windy areas.
Studies say 80% of roof leaks come from bad screw placement. By following the manufacturer’s rules and knowing your roof’s needs, you can avoid problems. This ensures your roof lasts a long time and works well.
Proper Screw Spacing for Different Substrates
When you install a metal roof, knowing the right screw spacing is key. The substrate you pick affects how you space your screws. This choice can make or break your roof.
Metal roofing panels need screws placed just right for the best performance. Each substrate has its own way of handling screws.
Spacing for Solid Wood Substrate
For solid wood, follow these important tips:
- Typical screw spacing: 24 inches on center
- Acceptable range: 18-36 inches depending on local conditions
- Focus on consistent placement across the entire roof surface
Spacing for Metal Purlins
Installing on metal purlins needs a smart approach to screw spacing:
| Purlin Spacing | Recommended Screw Pattern |
|---|---|
| Standard Conditions | 12-18 inches apart |
| High Wind Areas | 6-12 inches apart |
| Steep Roof Slopes | 6-8 inches apart |
High Wind Area Considerations
In areas with harsh weather, screw spacing is even more important. I suggest:
- Reducing standard spacing by 30-50%
- Using additional fasteners near roof edges
- Checking local building codes for specific needs
Correct installation can stop up to 90% of leaks. So, placing screws carefully is vital for your roof’s life and performance.
Fastener Installation Techniques and Common Mistakes
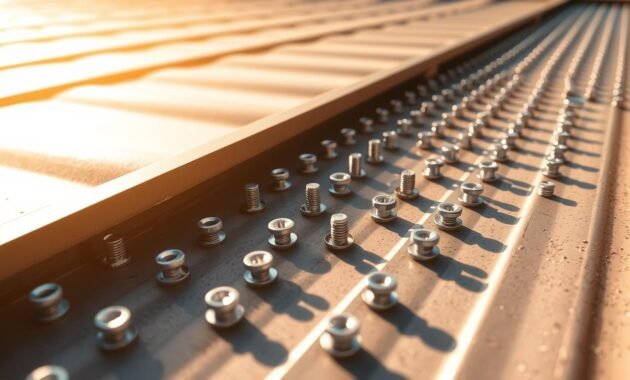
Metal roofing needs careful screw placement and alignment. A typical roof has thousands of screw holes. Each screw is key to the roof’s performance and weather protection.
Proper fastener installation is vital for a successful metal roofing project. Wrong screw placement can cause water leaks and weaken the roof.
- Avoid overtightening screws, which can damage rubber washers
- Ensure screws are installed perpendicular to the roof surface
- Remove metal shavings (swarf) immediately to prevent corrosion
- Use dedicated screw guns with adjustable torque settings
When working with different materials, follow specific fastener alignment tips. Pre-drilling is helpful for screws over 2 inches long to avoid angles.
| Substrate Type | Recommended Screw Gun Settings | Additional Considerations |
|---|---|---|
| Wood Substrate | 2,500 RPM | Use sharp-pointed screws |
| Thin Steel (< 1/4-inch) | 2,500 RPM | Ensure complete panel and purlin drilling |
| Thick Steel (≥ 1/4-inch) | 2,000 RPM | Use self-drilling point fasteners |
| Stainless Steel | 1,000-2,000 RPM | Match fastener corrosion resistance to environment |
By focusing on these metal roofing details, you can avoid common mistakes. Each screw is important for a tight and weather-resistant roof.
Calculating Required Screw Quantity
When installing a metal roof, finding the right number of screws is key. It ensures your roof lasts long and stays strong. I’ve learned that the right roof screw techniques are vital for a successful project.

Here are the main formulas for figuring out how many screws you need. They help you plan your metal roofing job well.
Formula for Metal-to-Wood Screws
For metal-to-wood jobs, a simple method works well:
- Multiply total roof square footage by 0.80 (80%)
- Or, use 80 screws per 100 square feet
- Remember to add more screws in windy areas
Metal-to-Metal Screw Requirements
Metal-to-metal jobs need a different approach. Keep these points in mind:
- Look at the panel type and roof pitch
- Check the local wind conditions
- Add extra fasteners for trim and flashing
When figuring out screws for metal roofs, add a 10% buffer to your estimate. This ensures you have enough screws for the job and for any extra needs.
Pro tip: For accurate screw placement, spacing varies by panel type and weather. In windy areas, you might need screws closer together for better roof stability.
REad also: Are GAF Shingles Good?
Weatherproofing and Sealing Methods
To make a metal roof watertight, you need the right weatherproofing. It’s important to space screws correctly and choose the best fasteners. The biggest reason for leaks is bad fastener installation.
- Use high-quality butyl tape at panel overlaps
- Apply specialized sealants at eaves and ridge points
- Select compression washers designed for metal roofing
- Ensure precise screw placement to minimize water entry points
When putting on a metal roof, focus on sealing well. Standing seam roofs are great because they have no exposed fasteners. This cuts down on moisture risks. But, corrugated roofs need careful fastener placement.
Important weatherproofing steps include:
- Choose roofing fasteners that fit your metal panel system
- Follow the manufacturer’s guide for screw spacing
- Install closure strips at panel ends to block wind and water
- Check washer integrity during installation to prevent leaks
Getting a pro to install your roof is key. A skilled roofer knows how to make your roof last for years.
Standing Seam vs Corrugated Panel Installation
Choosing between standing seam and corrugated panels is key for your roofing project. Each type has its own benefits for different needs and environments.
Let’s look at the main differences between these two metal roofing options:
Standing Seam Roofing Advantages
- Exceptional durability with a lifespan of up to 75 years
- Hidden fasteners reduce leak risk
- Can withstand winds up to Category 4 hurricane-force
- Handles thermal expansion well
- Made from 24-gauge steel
Corrugated Panel Considerations
- More affordable than standing seam
- Exposed fasteners need regular checks
- Lifespan is 40-50 years
- Made from 29-gauge steel
- Lower upfront cost
It’s important to think about your roofing needs carefully. Standing seam offers top-notch protection and looks, while corrugated panels are a budget-friendly choice. Your decision should be based on your budget, climate, and how long you want the roof to last.
Conclusion
In this guide, I’ve shared important tips on metal roofing installation. It’s a process that needs precision and attention to detail. Every step, from screw placement to technique, is key to a durable roof.
Proper installation can make your roof last 40-60 years. This is thanks to factors like screw spacing and torque levels. Getting it right saves money and keeps your roof strong.
Whether you’re using standing seam or corrugated panels, the basics are the same. Always follow the manufacturer’s guide and think about your area’s weather. Quality installation is essential for a strong roof that withstands harsh weather.
Your metal roofing journey is ongoing. Keep learning and stay up-to-date with the latest methods. A well-installed metal roof is a smart investment in your property’s future.


