Do you find your pergola unusable when it rains or gets too sunny? Many people face this problem, making their outdoor spaces less enjoyable. The fear of weather damage and uncomfortable conditions can ruin your backyard.
Adding a pitched roof to your pergola makes it strong and weather-proof. I’ll show you five easy steps to do this. This guide helps solve problems like roof vent cleaning and unclogging vent pipes. It’s all about making your outdoor space better.
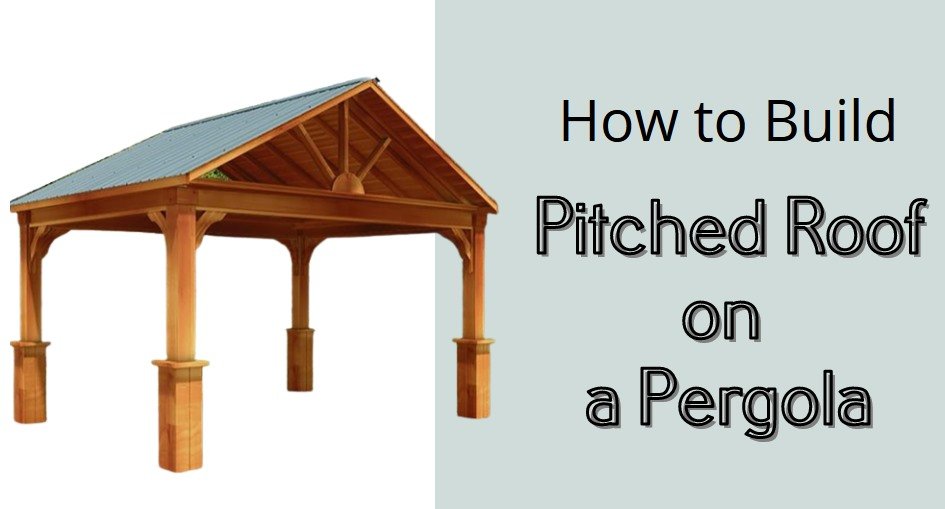
Understanding Pergola Roof Basics
Planning a pergola roof can be tricky, like fixing vent pipe issues. A good roof makes your outdoor area better and more useful. I’ve learned that planning well is key to a great pergola roof.

Benefits of Adding a Pitched Roof
A pitched roof brings many benefits to your pergola:
- Improved water drainage
- Enhanced structural integrity
- Better protection from sunlight and rain
- Increased outdoor living space functionality
Read also: How to Install Corrugated Metal Roofing On A Shed
Types of Roofing Materials
Choosing the right roofing material is important for durability. Here are some good options:
- Corrugated metal panels
- Polycarbonate sheets
- Wooden shingles
- Asphalt roofing
Essential Safety Considerations
Safety is the top priority when installing a pergola roof. Make sure the structure is strong, choose the right materials, and install carefully. This prevents accidents.
Getting help from a pro can solve complex roofing problems. They ensure your project follows local rules and is safe.
Required Tools and Materials Checklist
Before you start building a pitched roof on your pergola, it’s important to have the right tools and materials. Choosing quality equipment is key for a job well done. It ensures your roof will last and work well.

Here’s a detailed list of what you’ll need to fix plumbing and build your pergola roof:
Tools You’ll Require
- Impact driver
- Cordless drill
- Measuring tape
- Level
- Safety glasses
- Work gloves
- Ladder
- Chalk line
Materials Needed
| Material | Quantity | Purpose |
|---|---|---|
| Corrugated roof panels | As per pergola size | Primary roofing surface |
| Roofing screws | 1-2 boxes | Secure panel installation |
| Silicone roof sealant | 2-3 tubes | Waterproofing joints |
| Enclosure strips | Pergola perimeter length | Finish roof edges |
Choose high-quality materials for lasting roof maintenance. Make sure they fit your pergola and local weather. It’s wise to buy a bit extra for any unexpected needs.
Your safety is most important. Always wear protective gear and have all your tools ready before starting.
Preparing Your Pergola Structure
Before adding a pitched roof to your pergola, careful preparation is key. I’ll guide you through the essential steps to get your pergola ready. This is like laying the groundwork for a successful project that will protect your outdoor space.

Assessing Pergola Stability
First, check your pergola’s structural integrity. Look for weak points or damage, just like checking for blocked vent signs in plumbing. Check for:
- Rotting wood or decay
- Loose or wobbly support posts
- Cracks or structural damage
- Signs of wood insect infestation
Measuring and Planning
Accurate measurements are vital for a successful roof installation. Create a detailed plan with exact dimensions and roof pitch. Use a professional-grade measuring tape and sketch your roof design.
| Measurement Area | Recommended Action |
|---|---|
| Pergola Width | Measure entire structure width |
| Pergola Length | Measure entire structure length |
| Desired Roof Pitch | Calculate recommended angle (typically 4:12 to 6:12) |
Installing Support Beams
Reinforcing your pergola might be needed for the new roof. Additional support beams help distribute weight and prevent strain. Use galvanized hardware and ensure each connection is secure and level.
- Select pressure-treated lumber
- Cut support beams to precise measurements
- Attach using heavy-duty brackets
- Verify level and alignment
How to Build a Pitched Roof on a Pergola
Building a pitched roof for your pergola needs careful planning and precise steps. I’ll guide you through the key steps to make your outdoor space better. Before starting, check your roof vents to avoid moisture problems.
- Determine the Roof Pitch
- Recommended angle: 3:12 to 6:12 pitch
- Consider local weather conditions
- Ensure proper water drainage
- Prepare Rafter Materials
- Select pressure-treated lumber
- Cut rafters to consistent length
- Use a circular saw for precision
- Install Ridge Board
- Center the ridge board
- Secure with hurricane clips
- Check for level alignment
When doing DIY roof work, safety is key. Always wear protective gear and use stable ladders.
| Rafter Type | Recommended Wood | Length Range |
|---|---|---|
| Standard Rafter | Pressure-Treated Pine | 8-12 feet |
| Heavy-Duty Rafter | Cedar | 12-16 feet |
By following these steps, you’ll make a strong pitched roof for your pergola. It will look and function better. Always check local building codes and consider a pro if you’re unsure.
Installing Corrugated Roof Panels
Installing corrugated roof panels is key to a durable and waterproof pergola roof. The right methods prevent airflow blockages and ensure lasting protection for your outdoor area.
I’ll guide you through the essential steps to install these panels. We’ll use specialized roof vent tools for a professional finish.
Panel Overlap Techniques
Proper panel overlap is vital to stop water from getting in. When installing corrugated roof panels, keep these guidelines in mind:
- Overlap panels by at least 4-6 inches
- Ensure overlap follows the roof’s natural water flow direction
- Use waterproof fasteners at each overlap point

Proper Sealing Methods
Sealing is your main defense against leaks and damage. Use high-quality silicone sealant made for corrugated roofing materials.
| Sealing Technique | Best Practices |
|---|---|
| Sealant Application | Apply between panel overlaps and around fastener points |
| Coverage | Ensure complete coverage without gaps |
| Drying Time | Allow 24 hours for complete sealing |
By following these installation techniques, you’ll create a strong roof. It will protect your pergola from weather while keeping airflow and structure intact.
Adding Enclosure Strips and Fasteners
Adding enclosure strips is key when you put a pitched roof on your pergola. They keep water out and protect your structure. I’ll show you how to add these strips and secure your roof panels right.
Choosing the right fasteners is important for keeping your roof clean and your pergola strong. Use roofing screws with rubber washers for a tight seal. Opt for screws made for metal roofing to protect your roof’s vents and ensure safety.
- Select self-drilling roofing screws with EPDM washers
- Match screw length to panel thickness
- Space fasteners approximately 12-18 inches apart
- Ensure screws are driven straight and not over-tightened
Start by aligning the enclosure strips along the panel edges. Begin at the lowest point and go up. This way, water flows well and leaks are less likely. Make sure to seal the overlaps where panels meet.
When you install fasteners, put them in the raised parts of the panels. This makes your roof more secure and prevents leaks.
Weather Proofing and Sealing Tips
To keep your pergola roof safe from water damage, you need to focus on weatherproofing. I’ll show you the important steps to keep your roof dry and strong for many years.
Applying Silicone Sealant Effectively
Silicone sealant is key to stopping water from getting in. When fixing clogged vents, pay attention to areas where water might leak. First, clean all surfaces well to help the sealant stick better.
- Inspect all joints and seams carefully
- Clean surfaces with rubbing alcohol
- Apply a continuous bead of silicone sealant
- Smooth the sealant with a professional caulking tool
Maintaining Proper Drainage
Good drainage is vital for keeping water away from your roof. I recommend making your roof slightly sloped to let water flow off fast. This helps avoid damage and makes your pergola roof last longer.
- Ensure a minimum 1/4 inch slope per foot
- Clear debris from roof surfaces regularly
- Check gutters and downspouts for blockages
- Inspect seals and joints seasonally
Read also: Roof Leak Repair Sealant
By using these weatherproofing tips, you can protect your pergola roof from water damage. This way, you’ll have a beautiful outdoor space for years to come.
Common Mistakes to Avoid
Building a pitched roof on a pergola can be tricky. Many DIY enthusiasts make critical errors that ruin the project. Knowing these mistakes can save you time, money, and frustration.
Detecting plumbing and structural problems early is key. Here are the most common mistakes to avoid:
- Incorrect measurements that lead to poor roof alignment
- Neglecting proper drainage systems
- Using incompatible or low-quality roofing materials
- Skipping critical support beam reinforcement
- Ignoring local building codes and permit requirements
Measurement errors can ruin your pergola roof project. Always double-check your measurements before cutting materials. This ensures a tight, leak-free roof that can handle different weather.
When doing roof pipe maintenance, watch out for water drainage issues. Improper slope or insufficient runoff can cause water pooling. This can lead to structural damage and leaks. Always make sure the roof has a slight pitch to let water flow away.
Spending time on careful planning and using quality materials can avoid most mistakes. Take your time, research local building requirements, and seek professional help if needed.
Conclusion
Building a pitched roof for your pergola is more than a weekend project. It’s a big change for your outdoor space. I’ve shown you each important step, from the basics to adding the final panels. It might look hard, but with good planning and detail, you can make a strong shelter.
Proper installation is key, not just for covering your pergola. It’s about making a strong structure that can handle rain, wind, and blocked vents. Just like fixing plumbing vents, building your roof needs precision.
If you’re unsure about any step, get help from a pro. DIY projects are great, but safety and strength come first. Your new roof will last for years, keeping your space safe and perfect for relaxing or entertaining.
With the right tools, materials, and approach, you’ll turn your pergola into a strong, useful outdoor area. It will stand up to whatever the weather brings.


